Task Block Advanced Usage
Long-Running Tasks
Some task Blocks are expected to take much longer than ordinary executions. In YAML, this is typically expressed with long_running.
long_running: true
Use this only when the task is genuinely long-running, for example:
- The task often takes 10 minutes or more.
- The runtime clearly scales with input size and may become very long for larger inputs.
- The task represents background-style processing rather than a short synchronous call.
Do not mark a task as long-running just because one execution happened to be slow once. One-shot API calls, short conversions, and ordinary file operations are usually better left as the default behavior.
If you are editing YAML directly, keep the rule simple:
- Omit
long_running, or usefalse, by default. - Use
trueonly for clearly long or input-scaled work.
For nearby authoring rules such as secrets, OOMOL auth, Fusion-first choices, and runtime path fallback, see Secrets, Auth, and Runtime Paths.
Using Fusion in Task Blocks
Task Blocks commonly package a Fusion call into a stable reusable interface for other users.
This is usually the right pattern when:
- the capability is already provided by OOMOL Fusion
- you want users to fill in business inputs instead of configuring external model keys
- you want auth to follow the OOMOL token flow
In Studio, initialize the SDK from runtime context:
- TypeScript:
token: await context.getOomolToken(),baseUrl: context.fusionApiUrl - Python:
token=await context.oomol_token(),base_url=context.fusion_api_url
For concrete SDK usage, see Fusion SDK Overview, Fusion SDK for TypeScript, and Fusion SDK for Python.
View Source Code
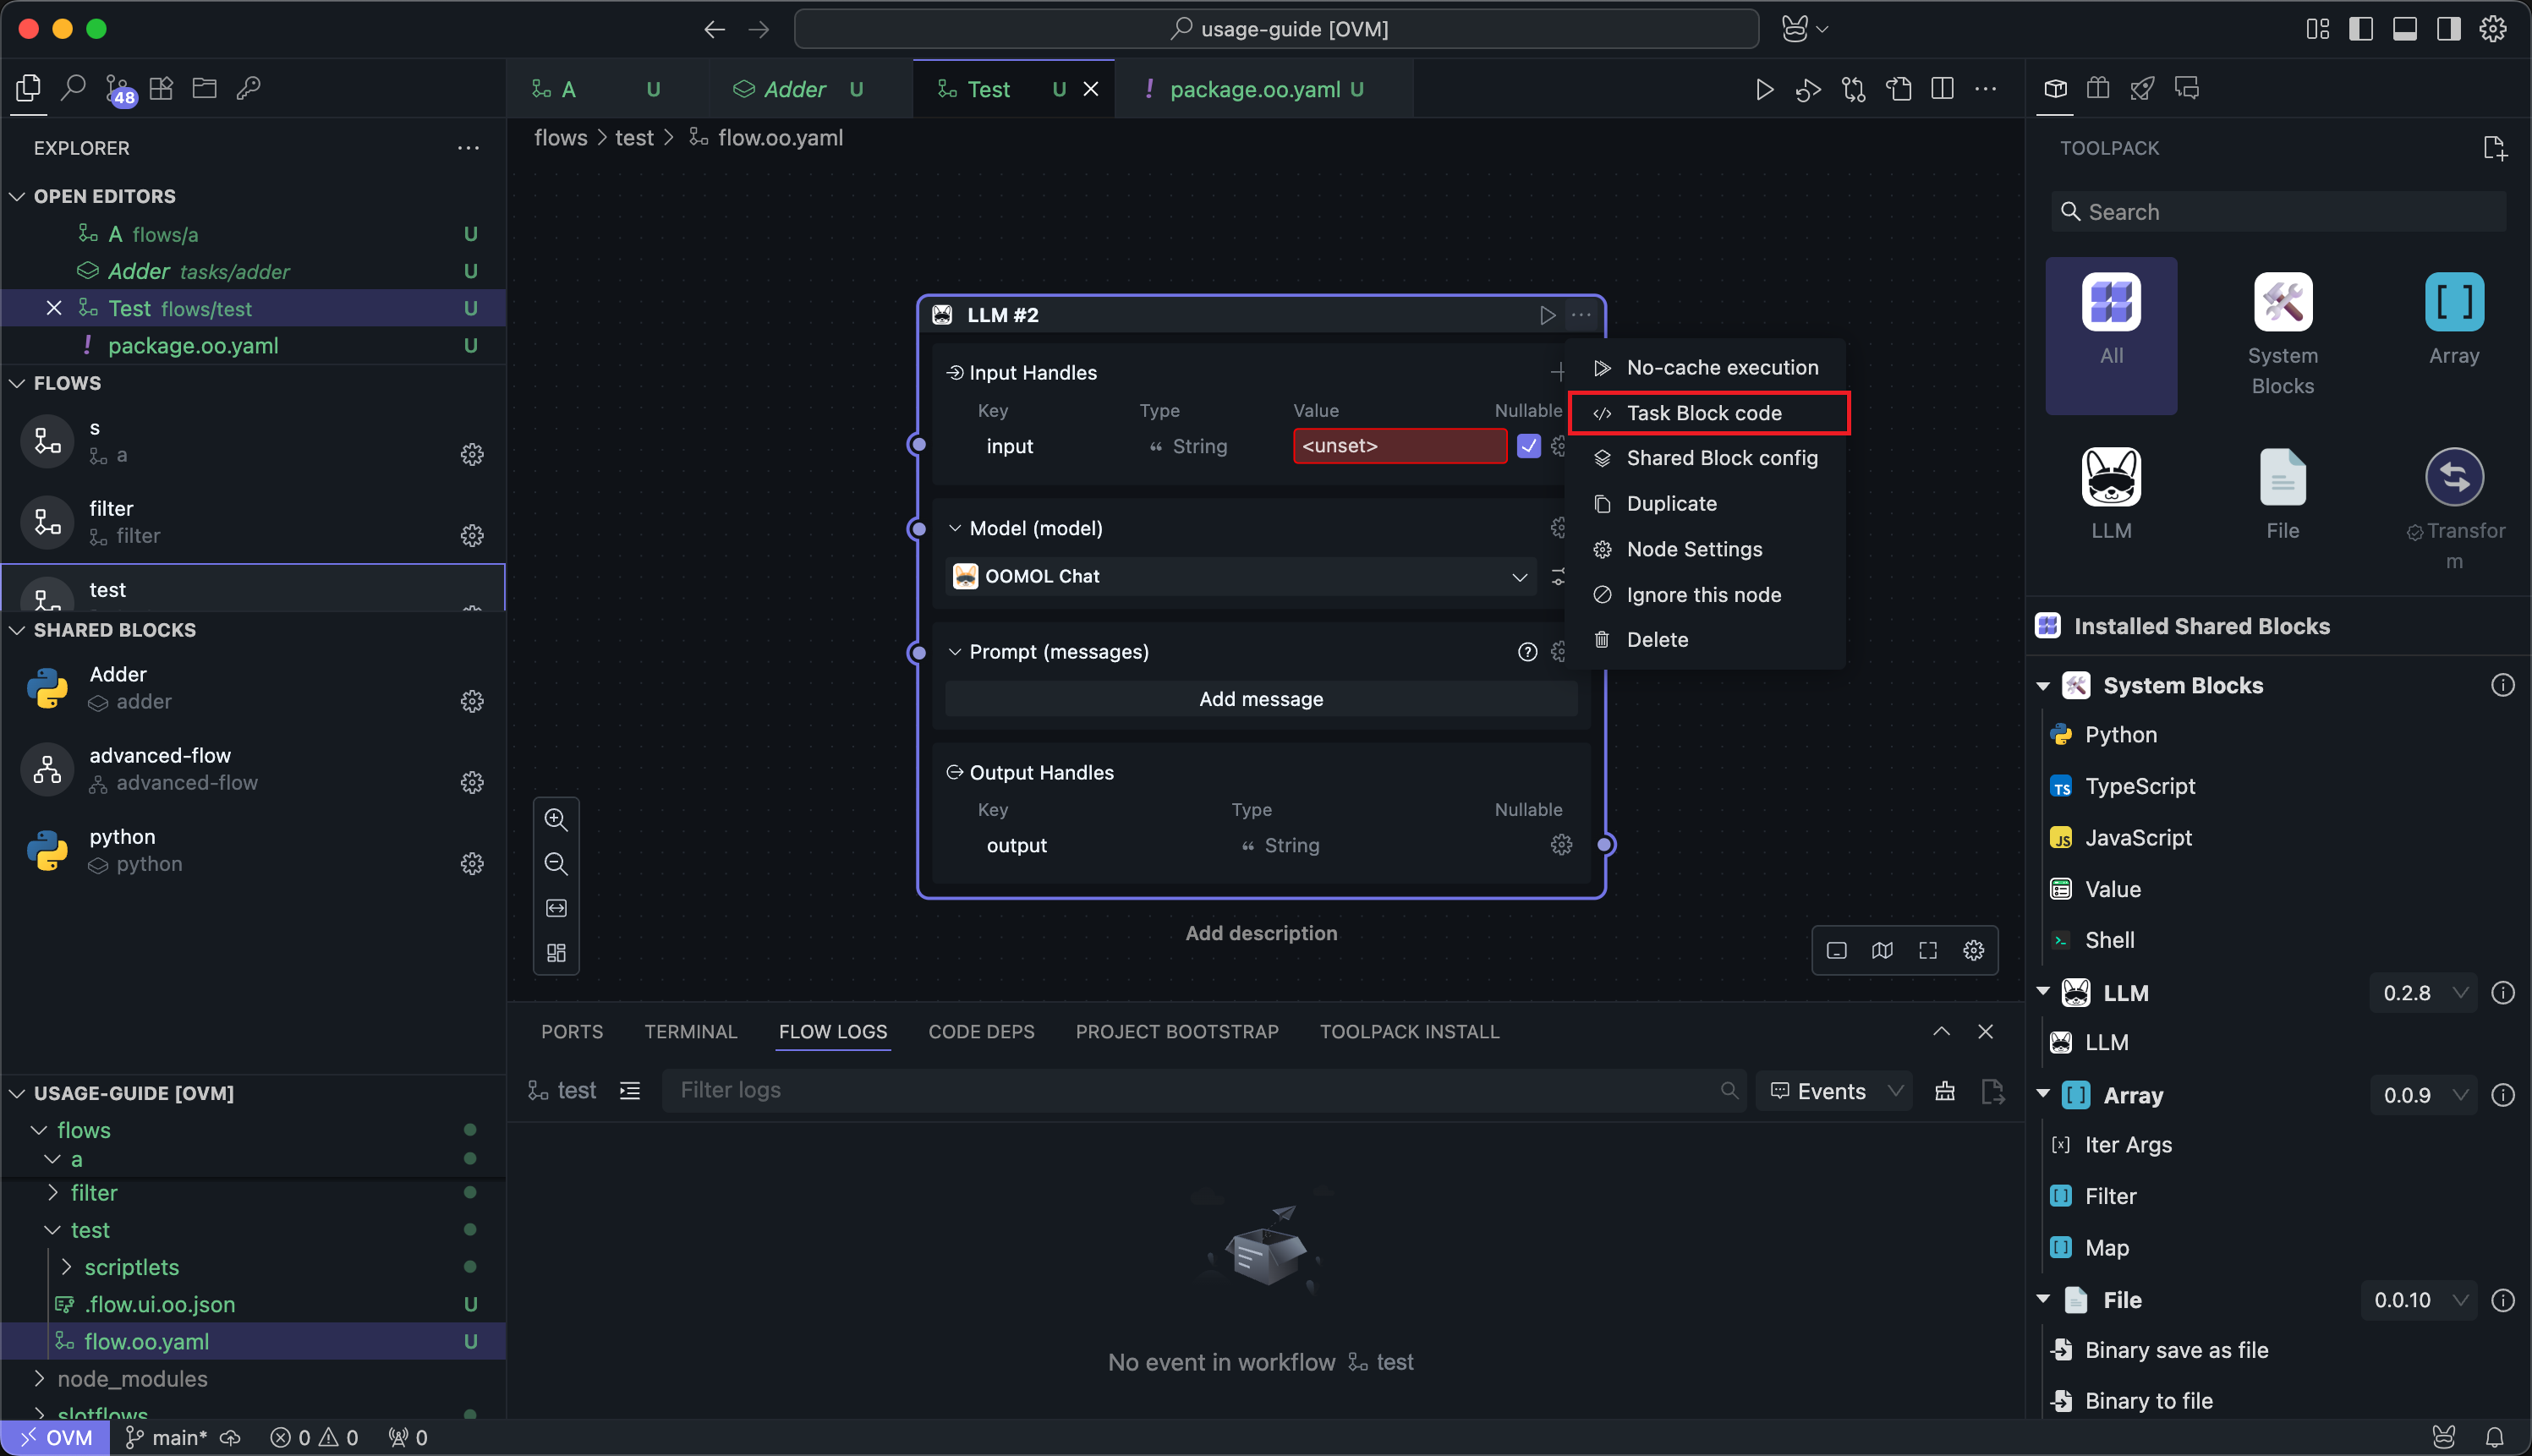
After converting a Scriptlet Block to a Task Block, the code will be hidden, but the code file itself still exists.
You can click the Task Block Code option in the Node menu to open the source code:
For local Task Blocks, you can also view the source code through the settings button or the code button in the settings page:
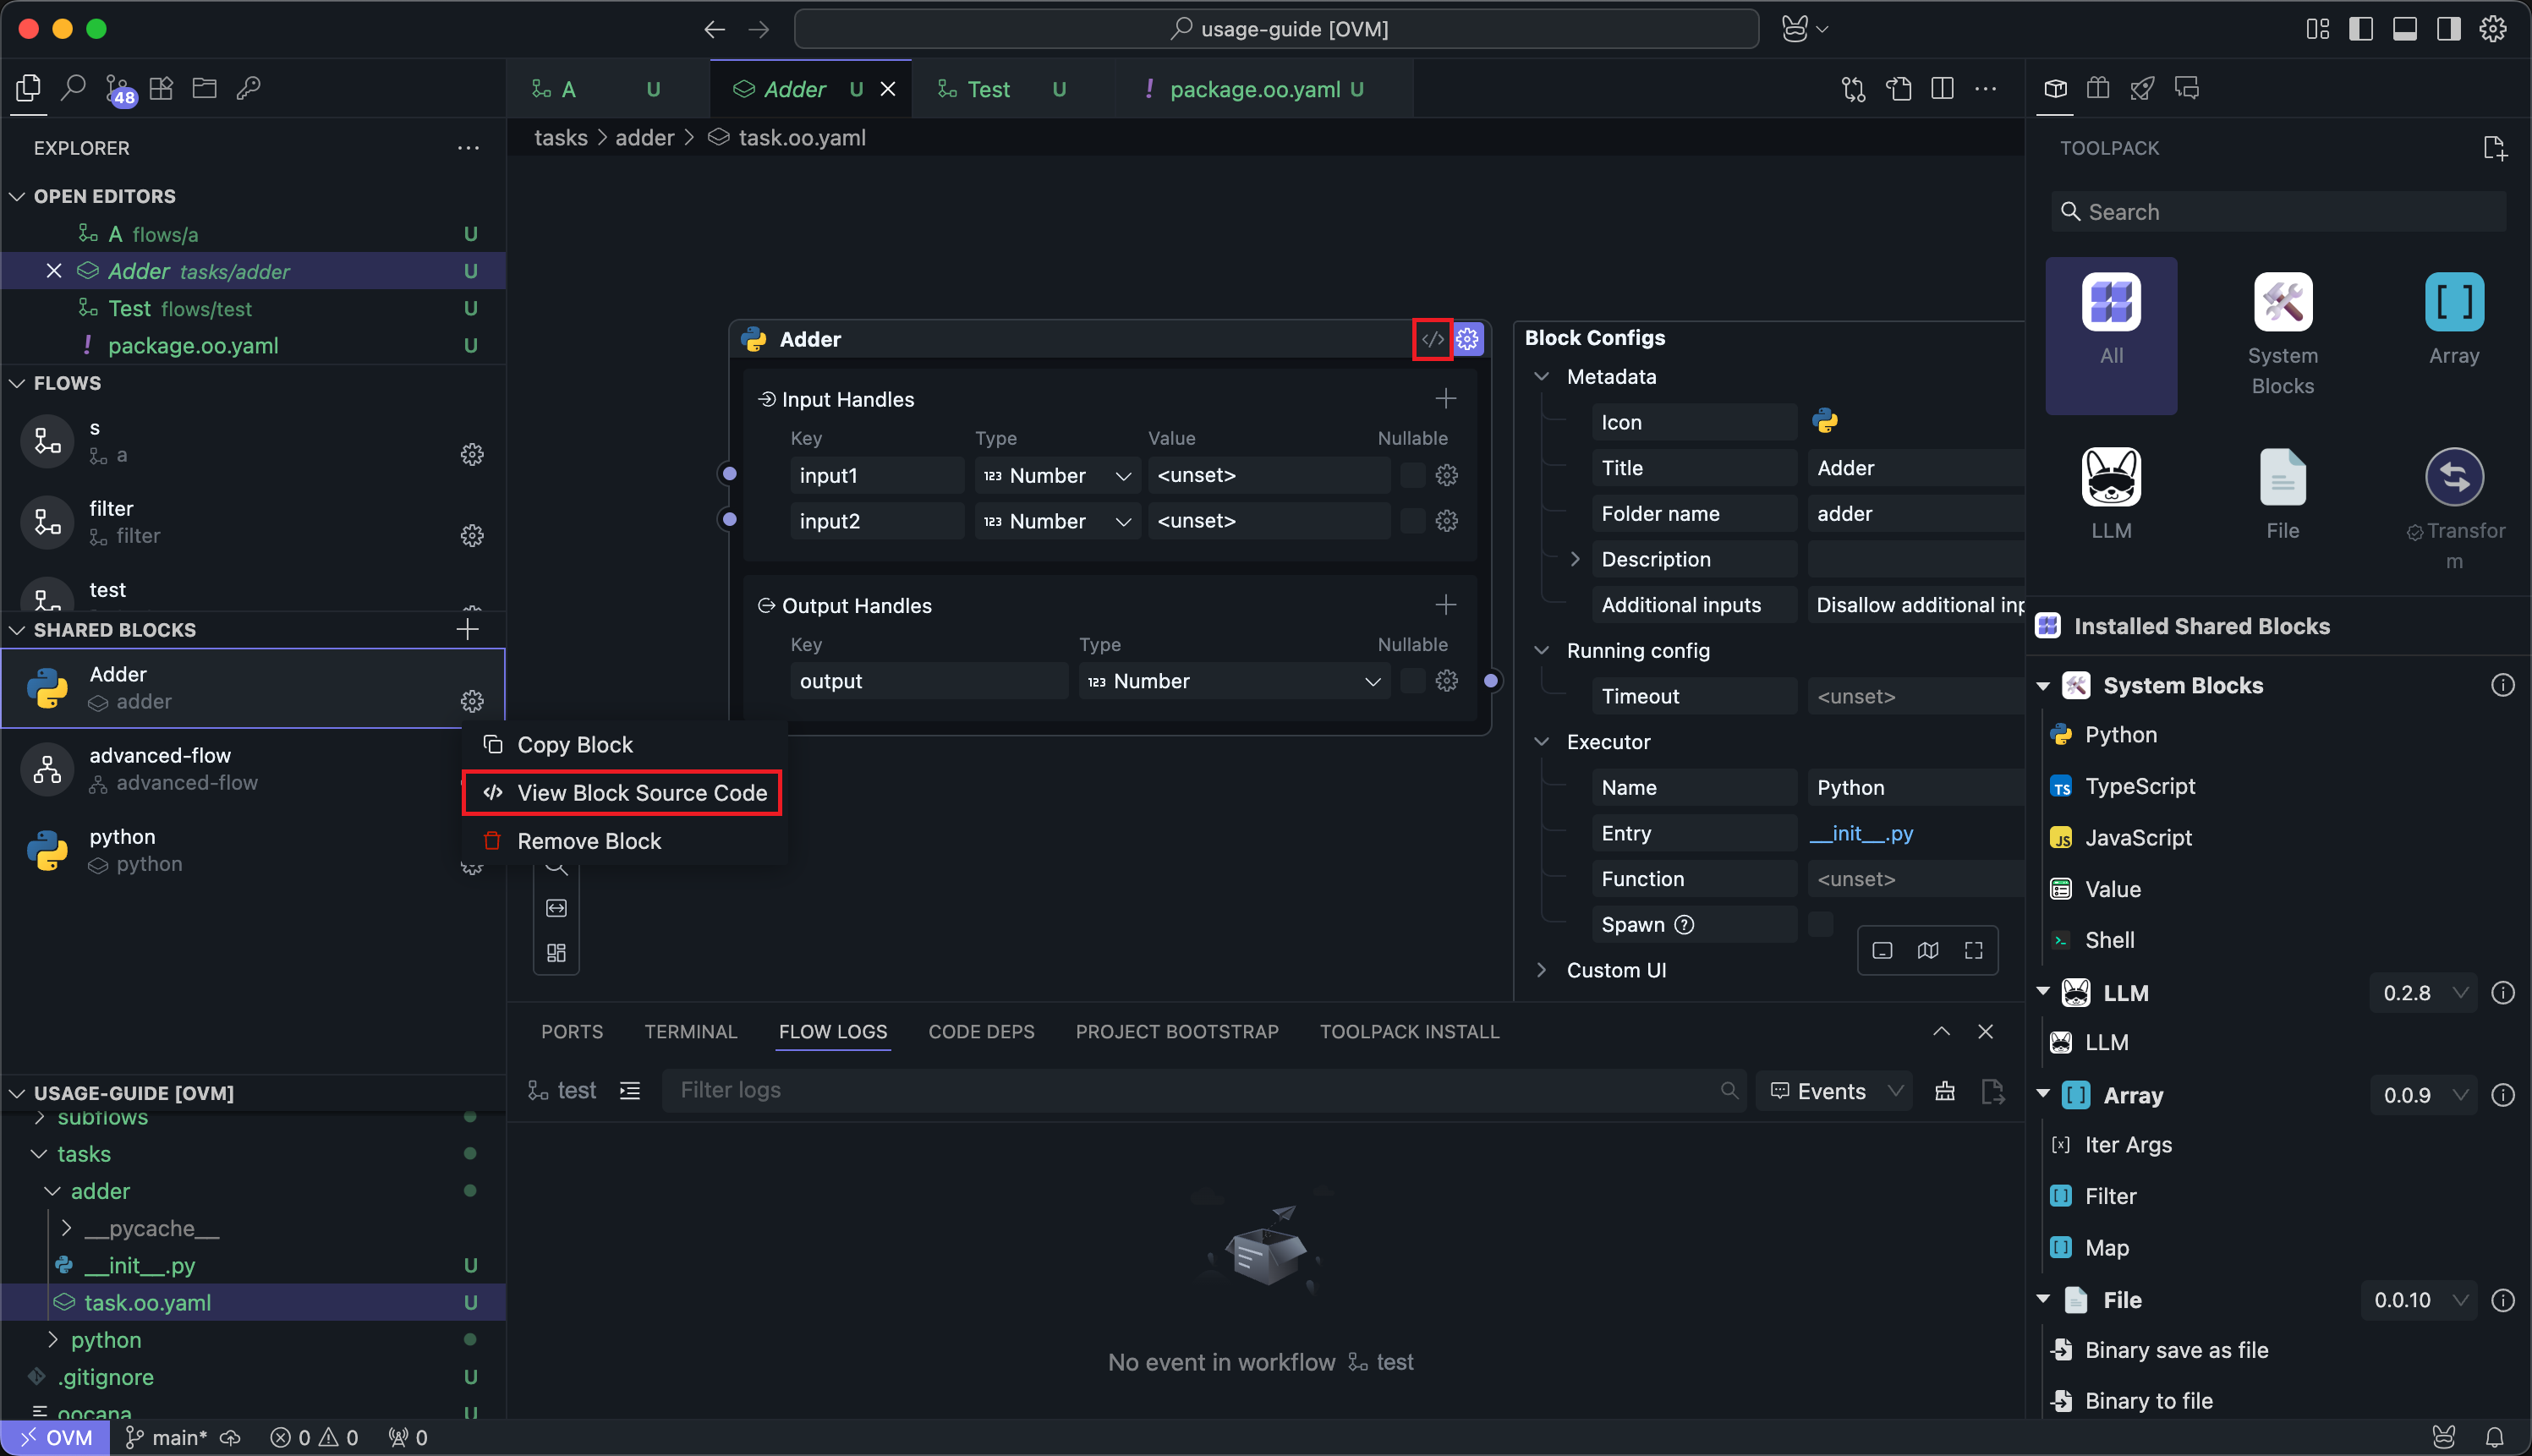
For local Task Blocks, you can edit the source code; otherwise, the source code is read-only.
Custom Rendering
This experimental feature is still under development. While we will continue to improve the user experience in future versions, please note that newer versions of OOMOL Studio may not be compatible with custom rendering code from previous versions. If you encounter issues with custom rendering after upgrading OOMOL Studio, please rewrite your custom rendering code according to the version update logs.
Using custom rendering requires some React frontend technology foundation.
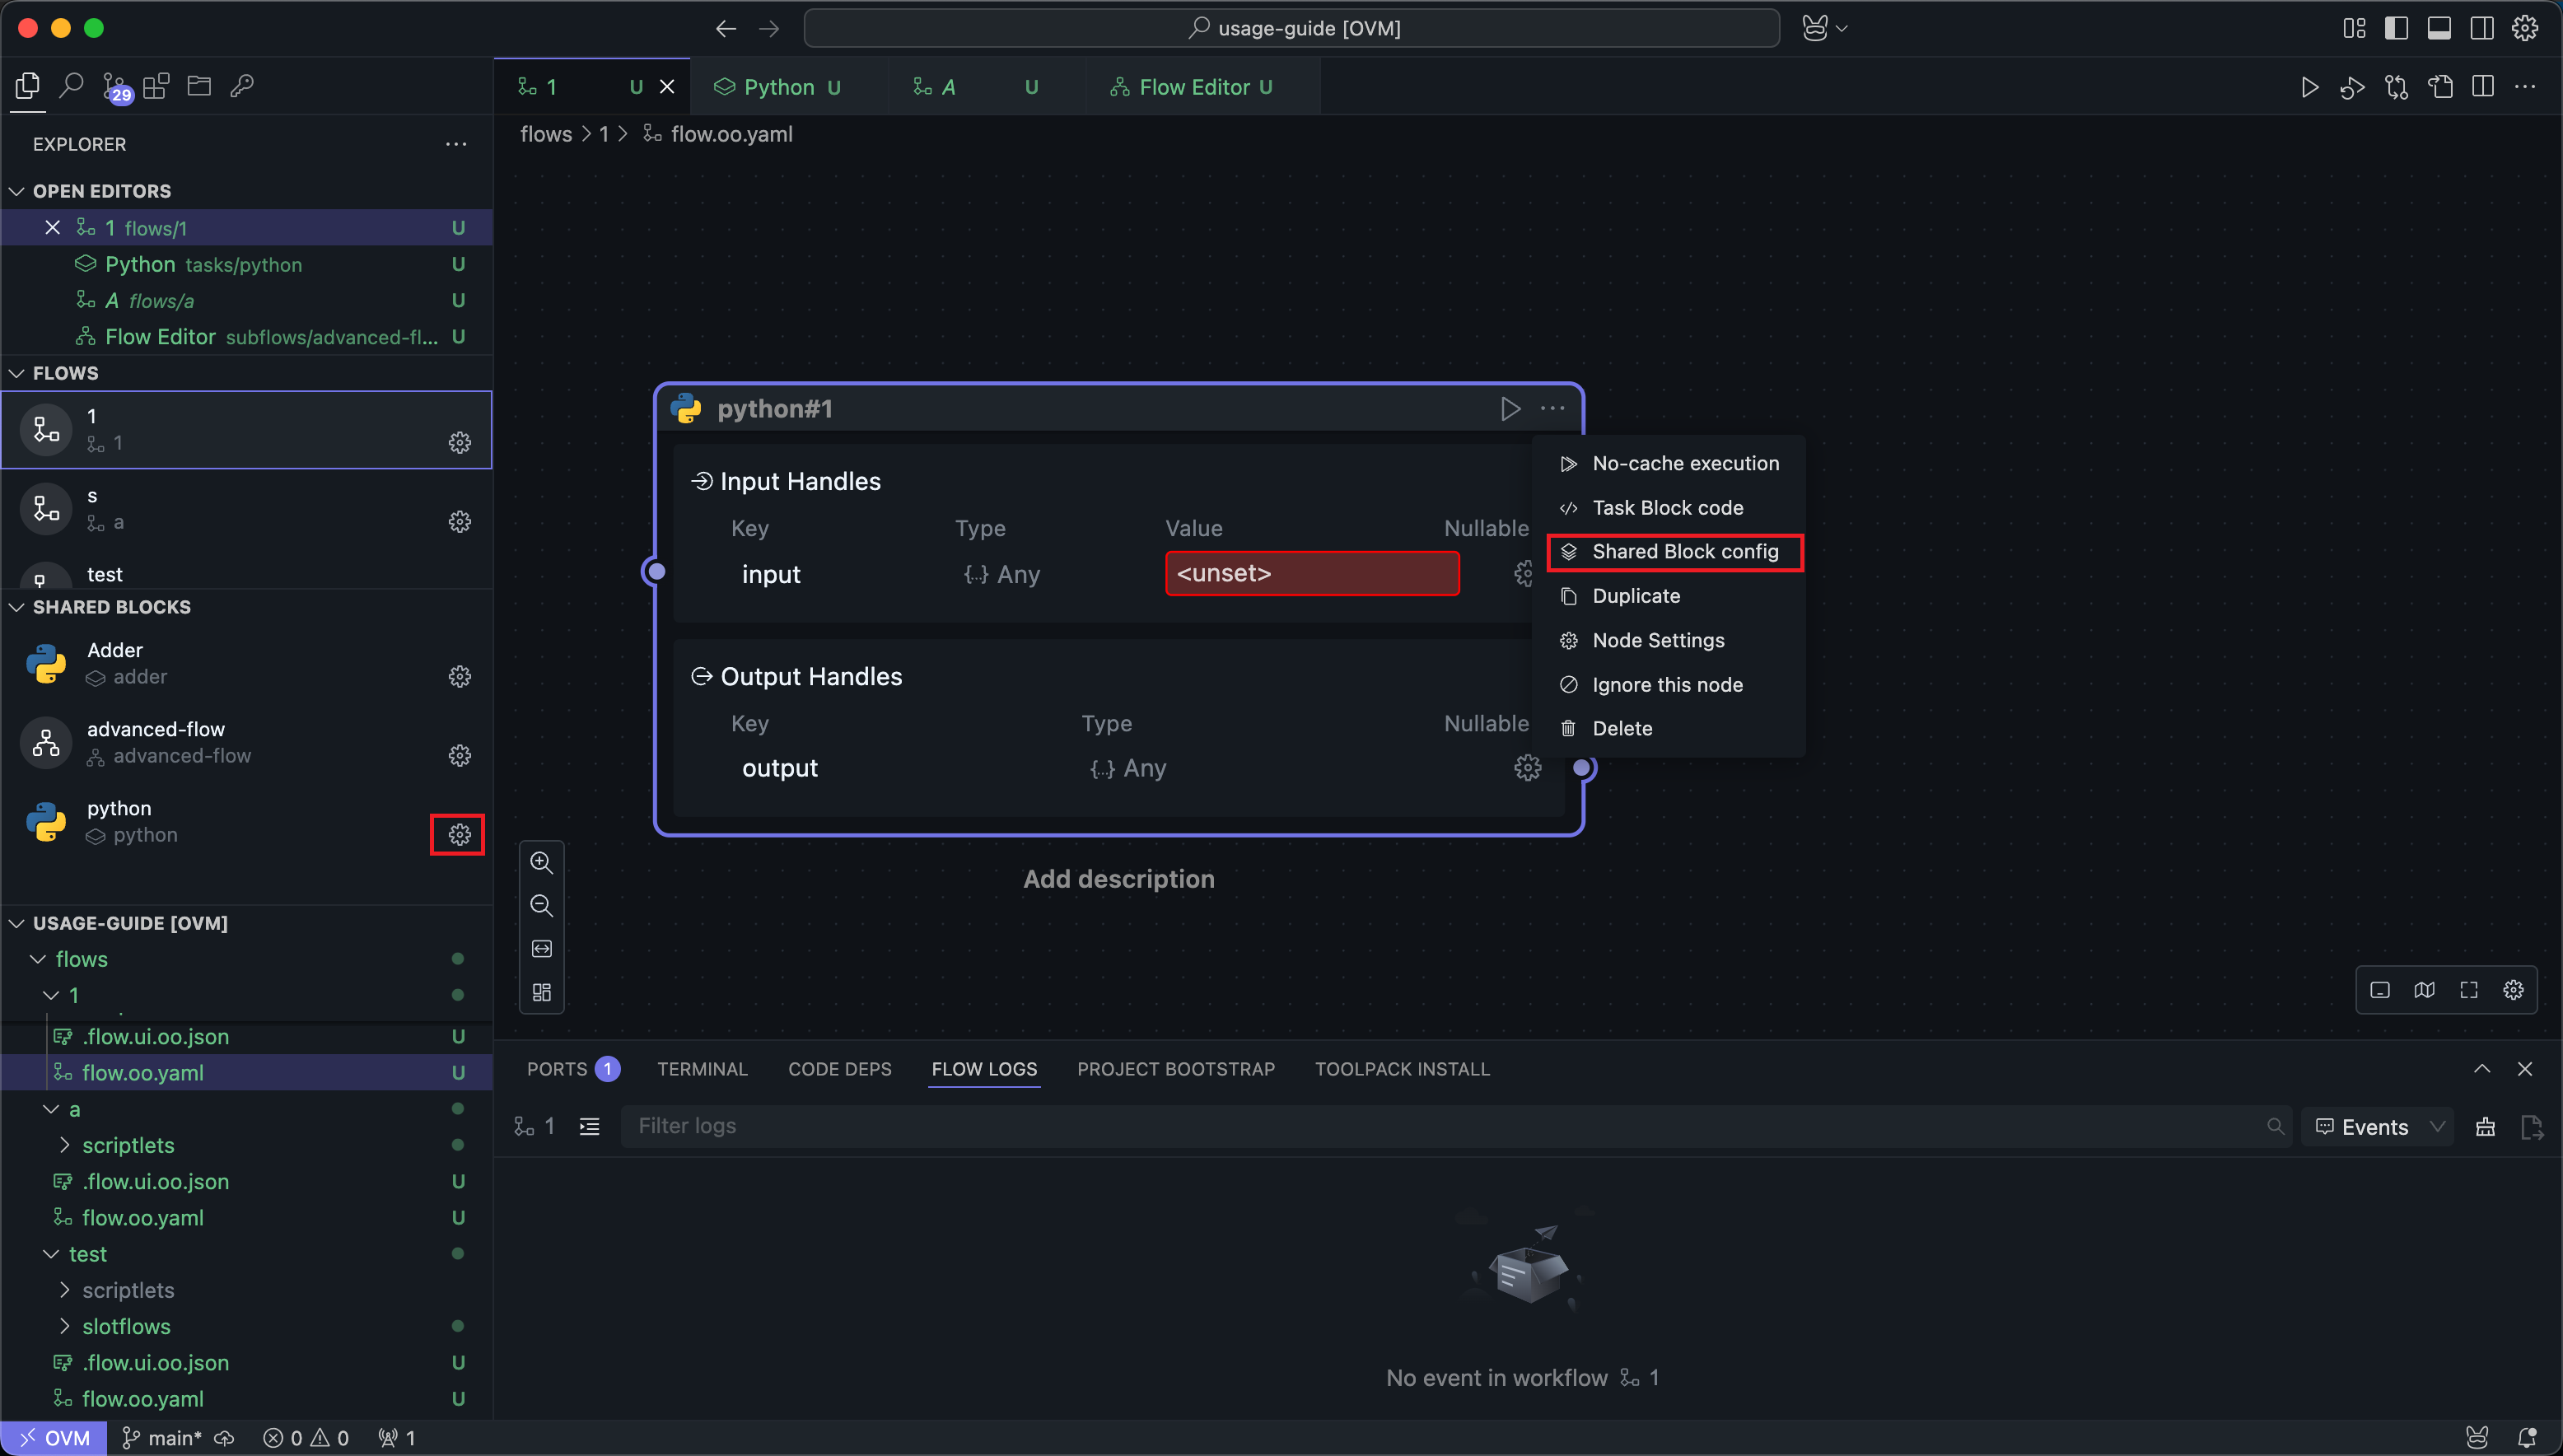
Task Block Nodes have a Configure Shared Block menu item. Click it to enter the shared Block configuration.
You can also directly click the settings in the left shared Block panel to enter the configuration.
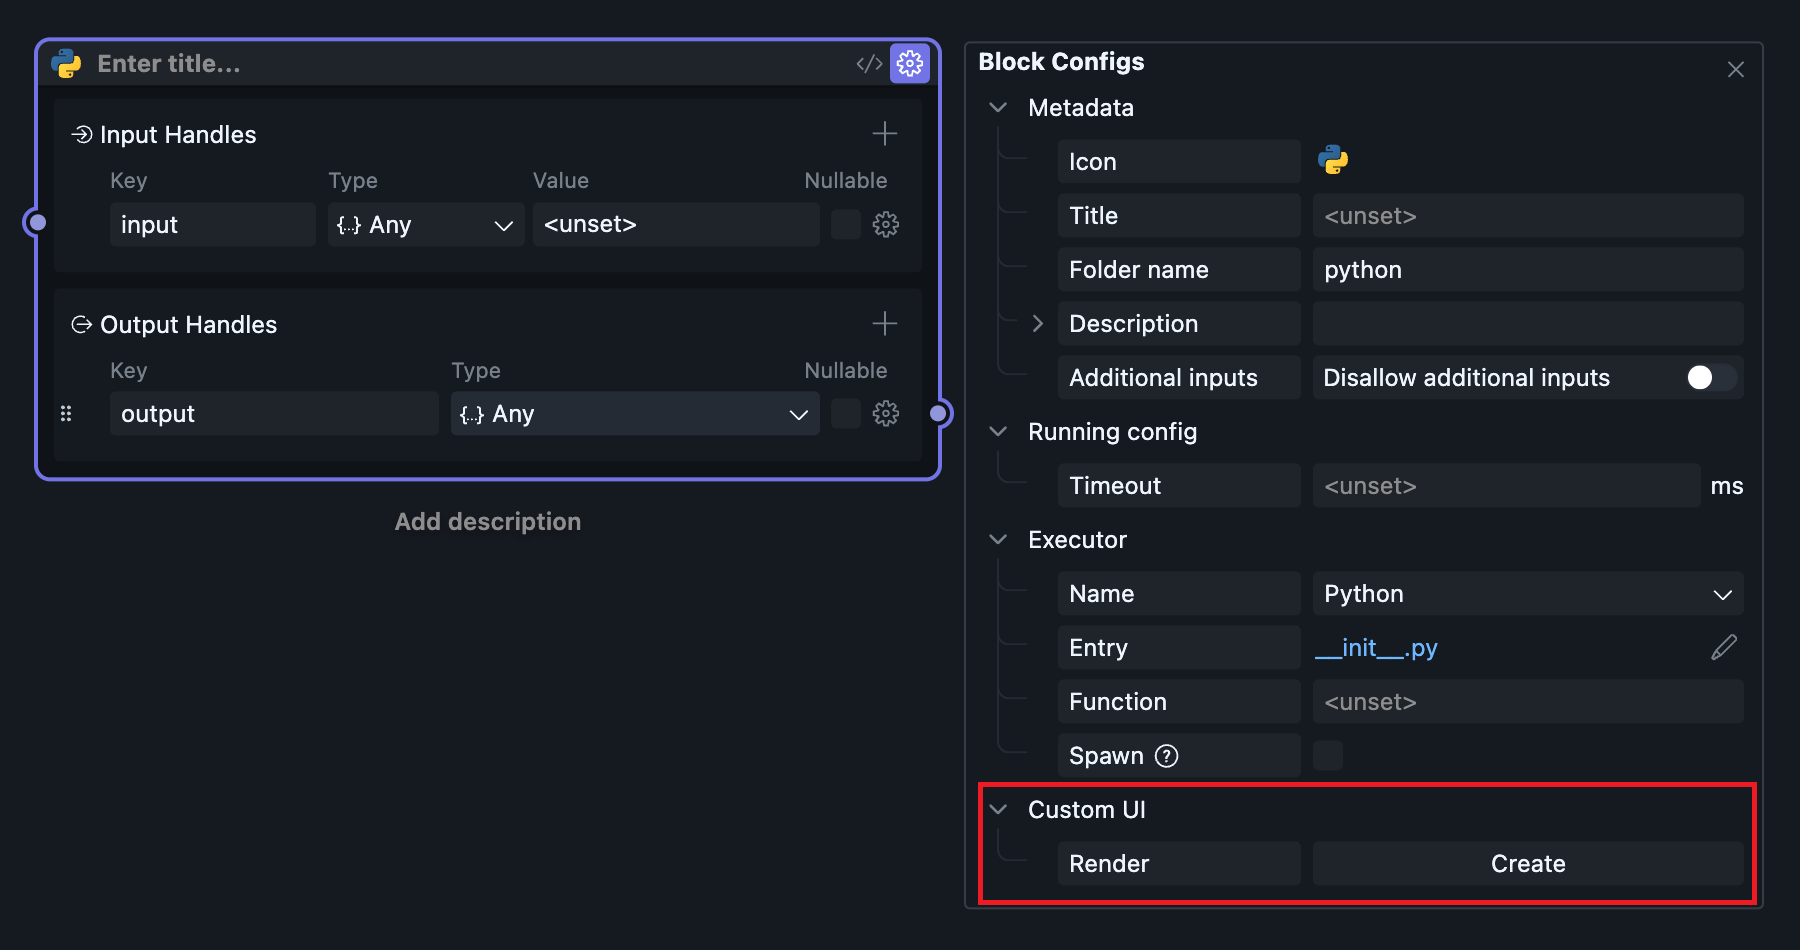
Task Block configuration is the same as Universal Block Settings except for the Custom UI section.
Since the built-in Node.js preview and Python preview APIs cover only a limited set of display scenarios, OOMOL Studio also provides custom UI so Block authors can control what gets rendered.
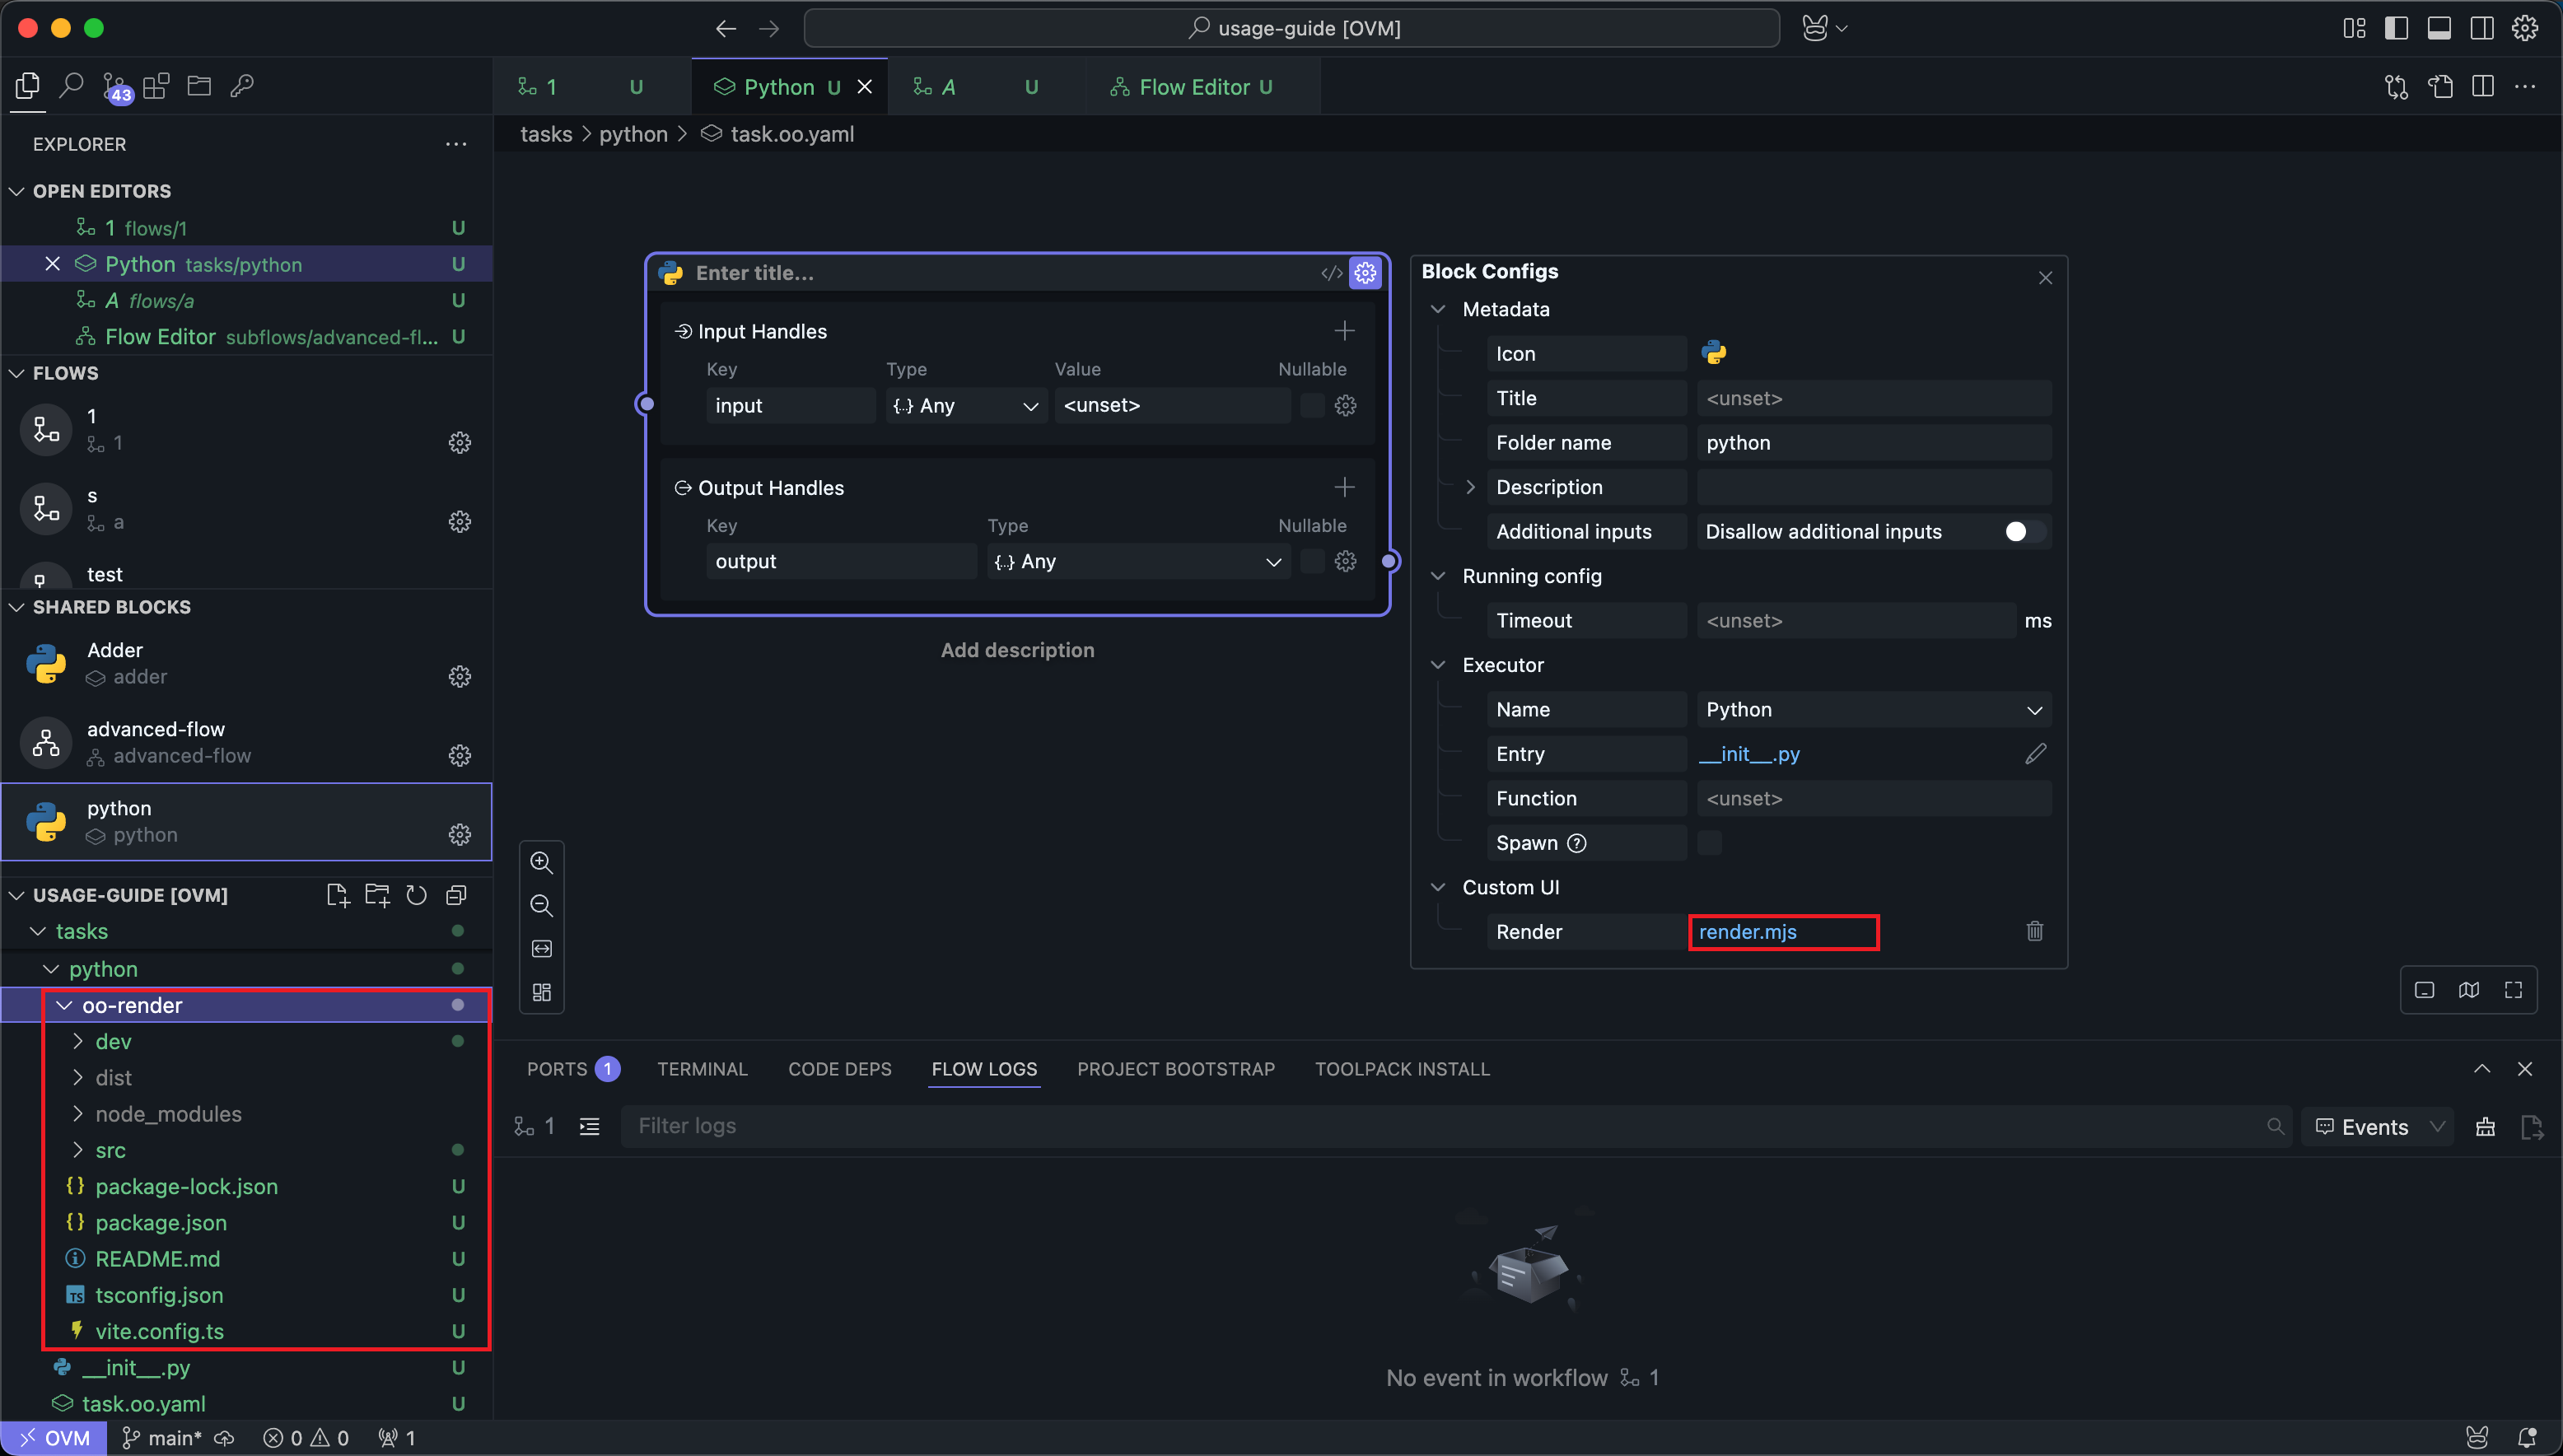
After clicking the Create button under Custom UI in the Block configuration panel, wait for a moment, and OOMOL Studio will automatically initialize a set of UI template code.
You can find the template code folder in the file explorer on the left, and the code entry file will appear under the Custom UI configuration item.
Code Development
In the automatically generated code, you can find a src folder, which contains the custom UI code.
The custom UI code editing entry is in oo-render/src/render.tsx. We can see that the custom UI obtains external properties by listening to message events:
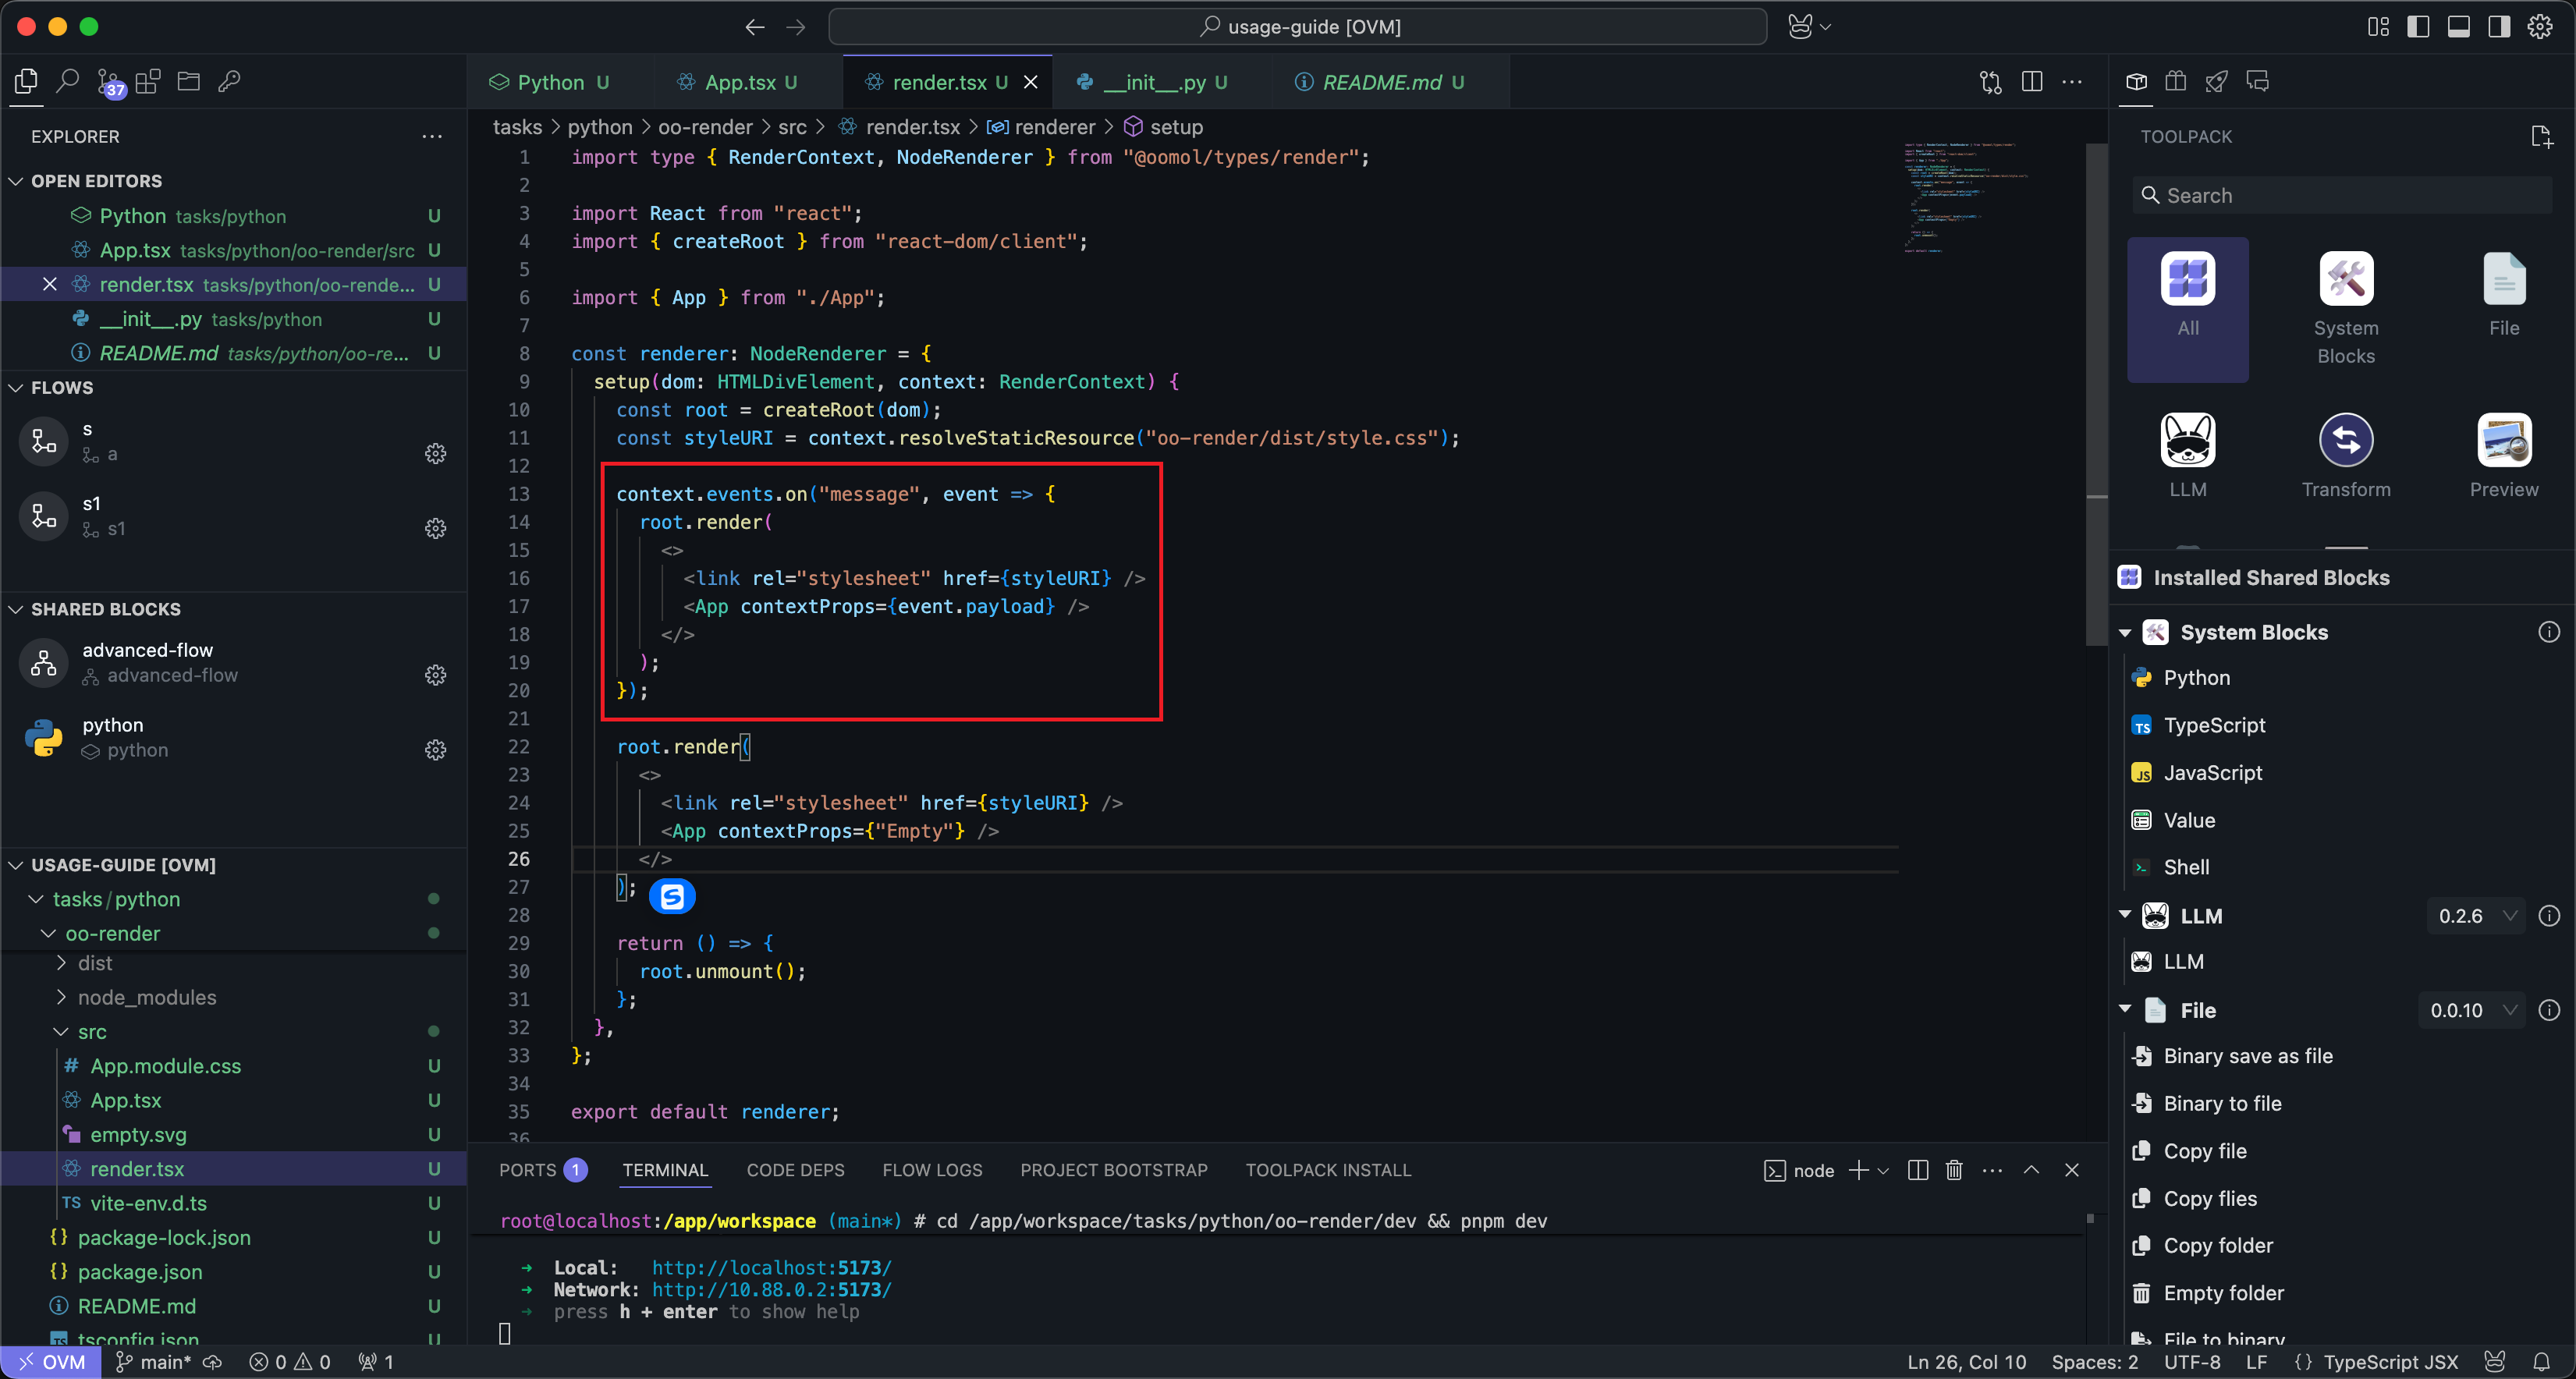
So we can call the context.send_message() method in the Block code to send data to the custom UI:

Here we sent a string with the input content.
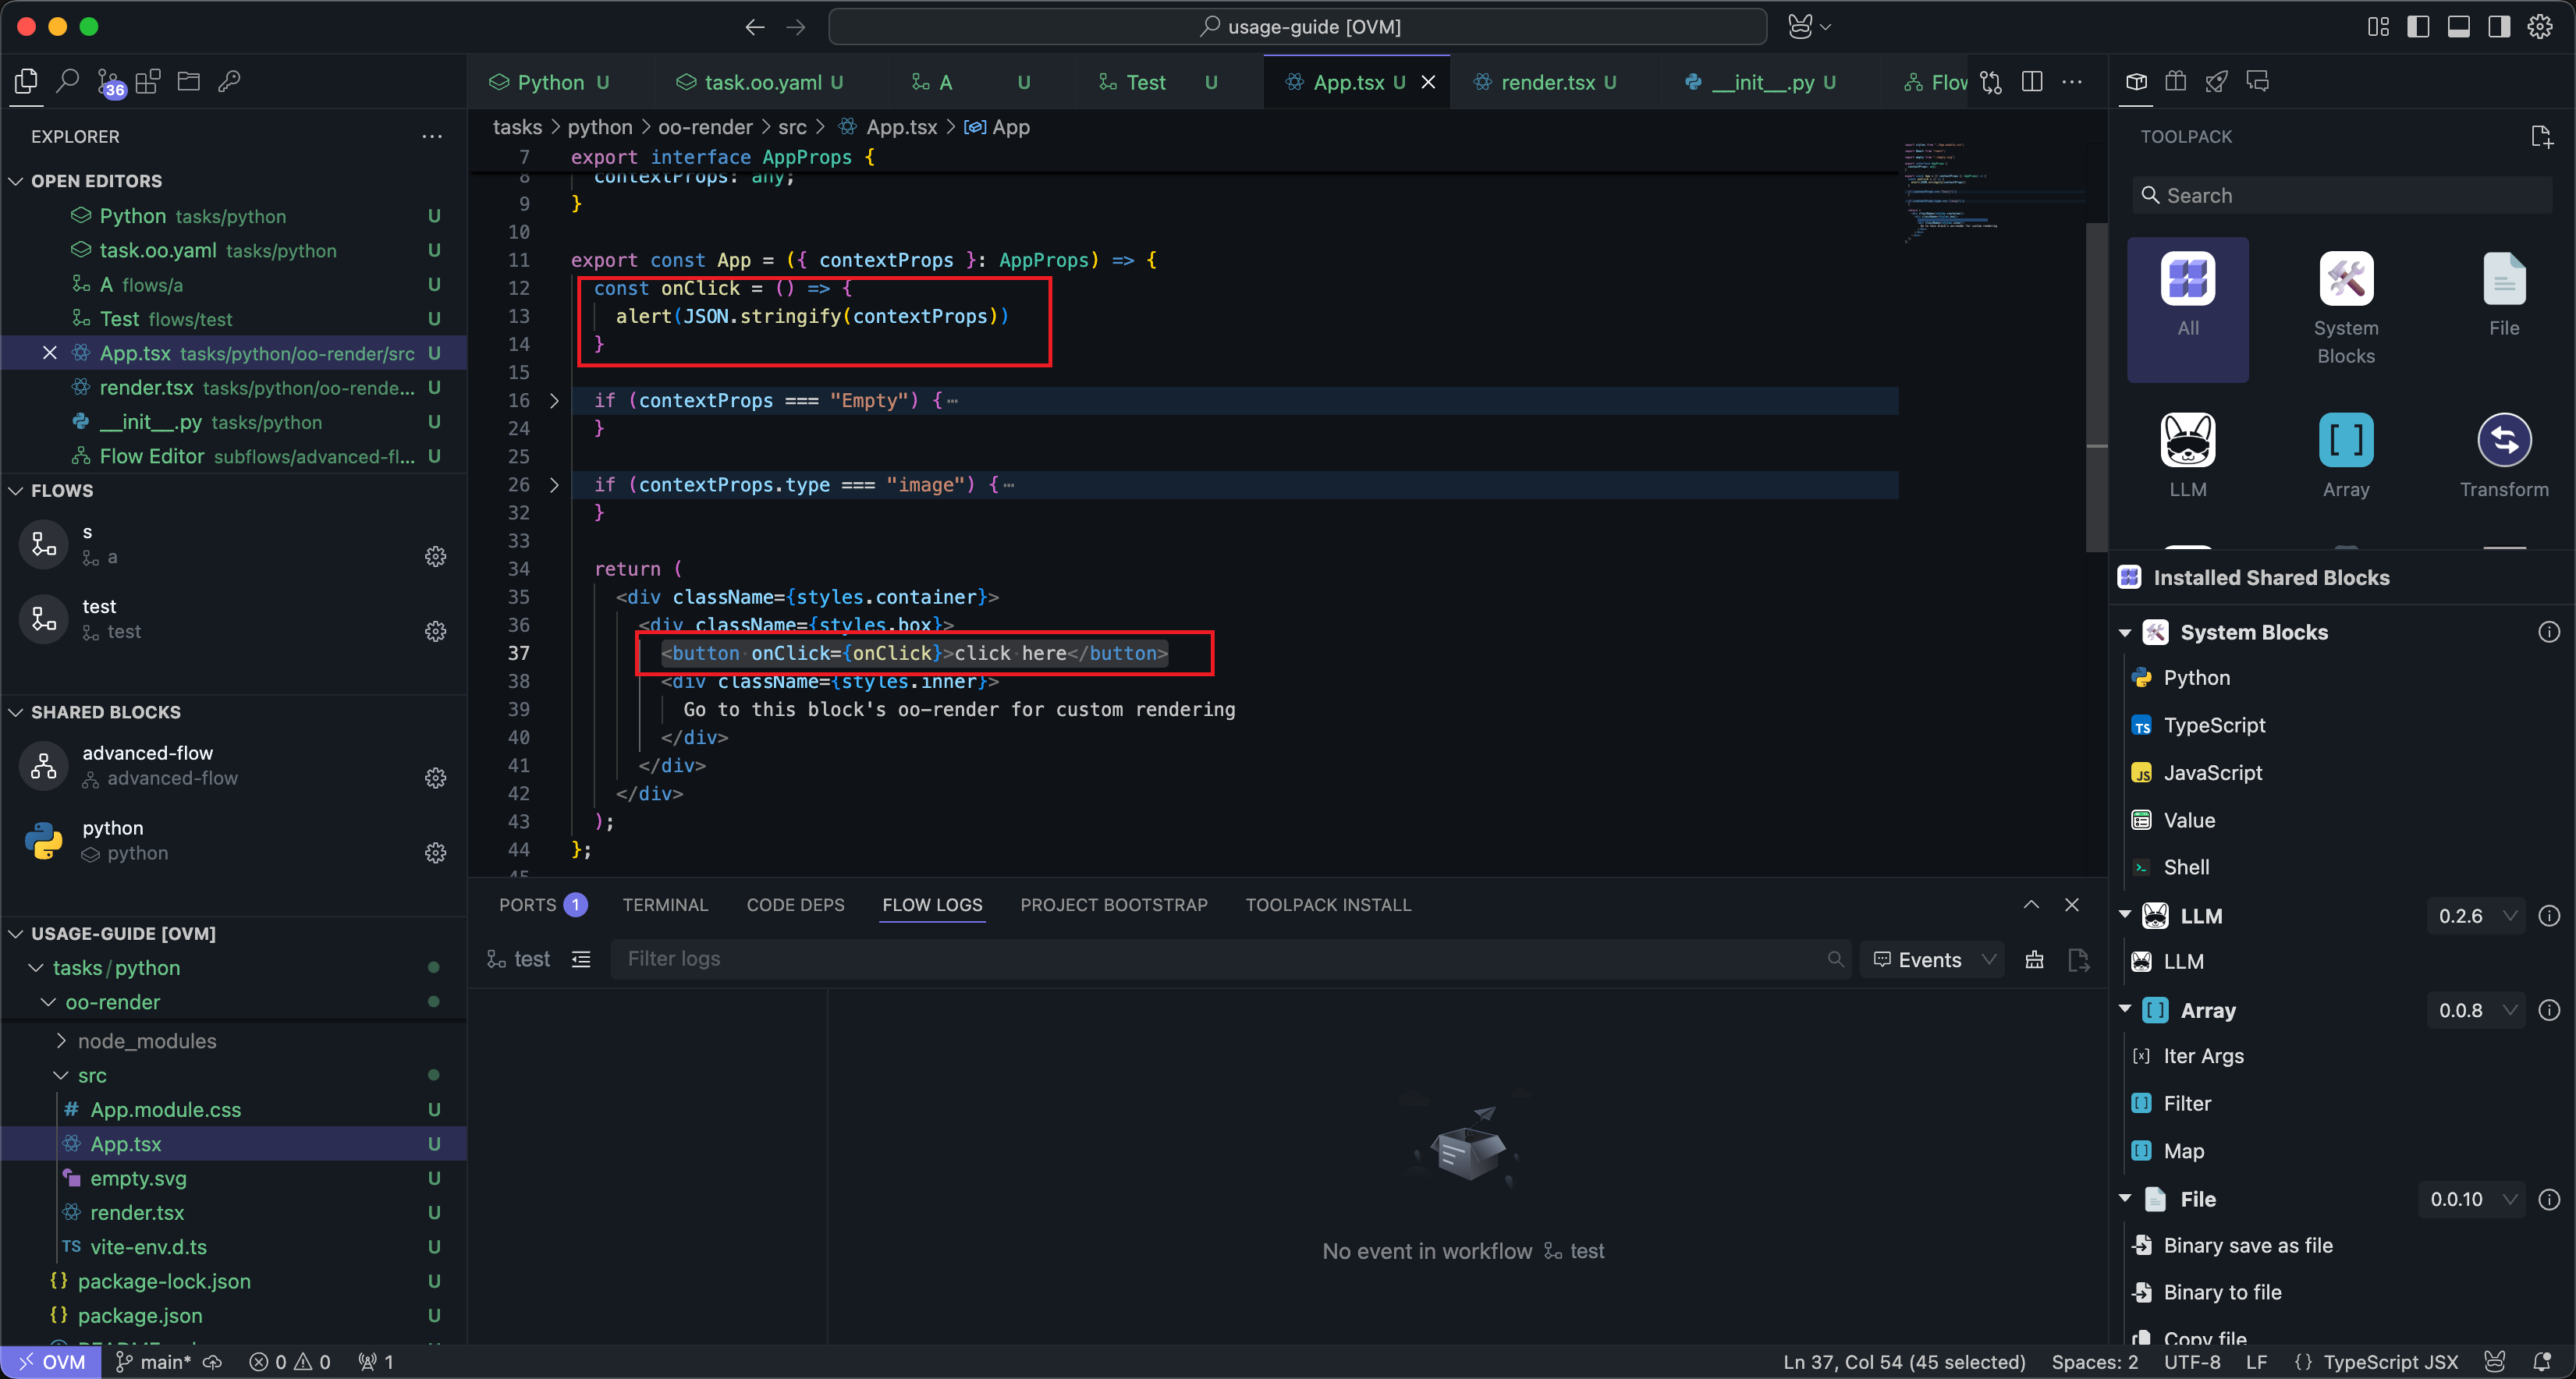
Then we can edit the code in oo-render/src/App.tsx. Here we replace the code that directly prints data with a button that will show an alert with the data when clicked:
Then enter the custom UI directory in the terminal:
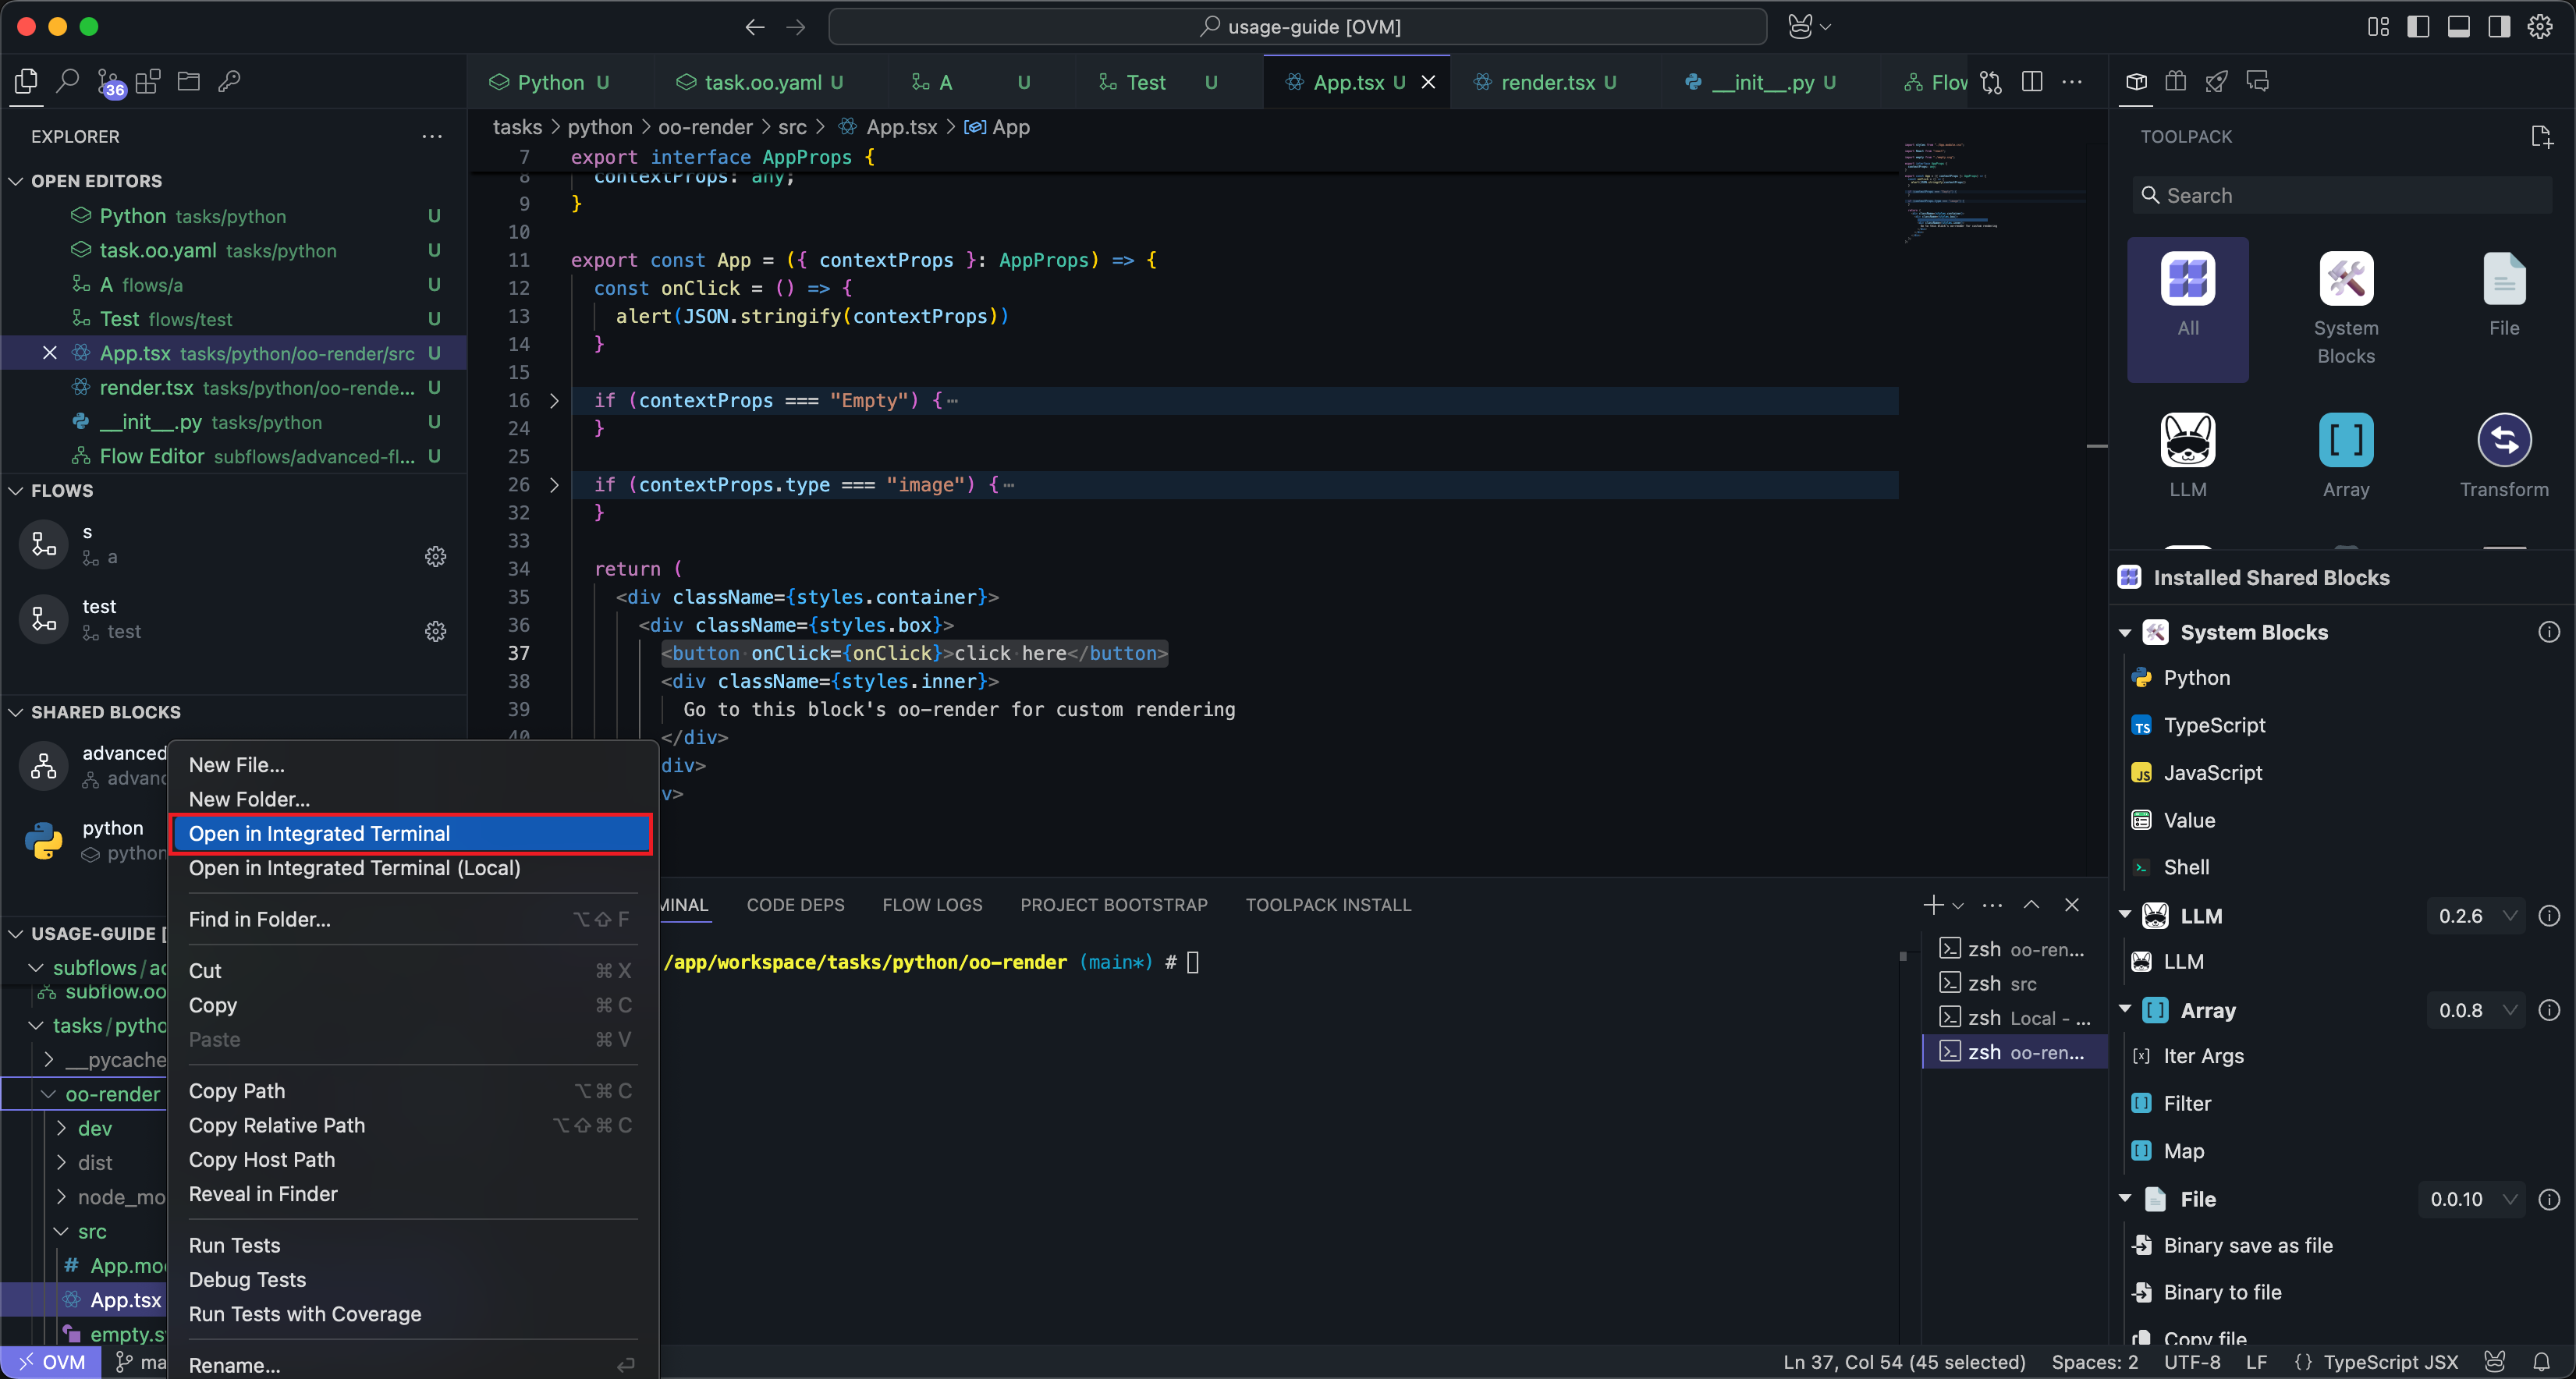
Run
pnpm build
to build the code.
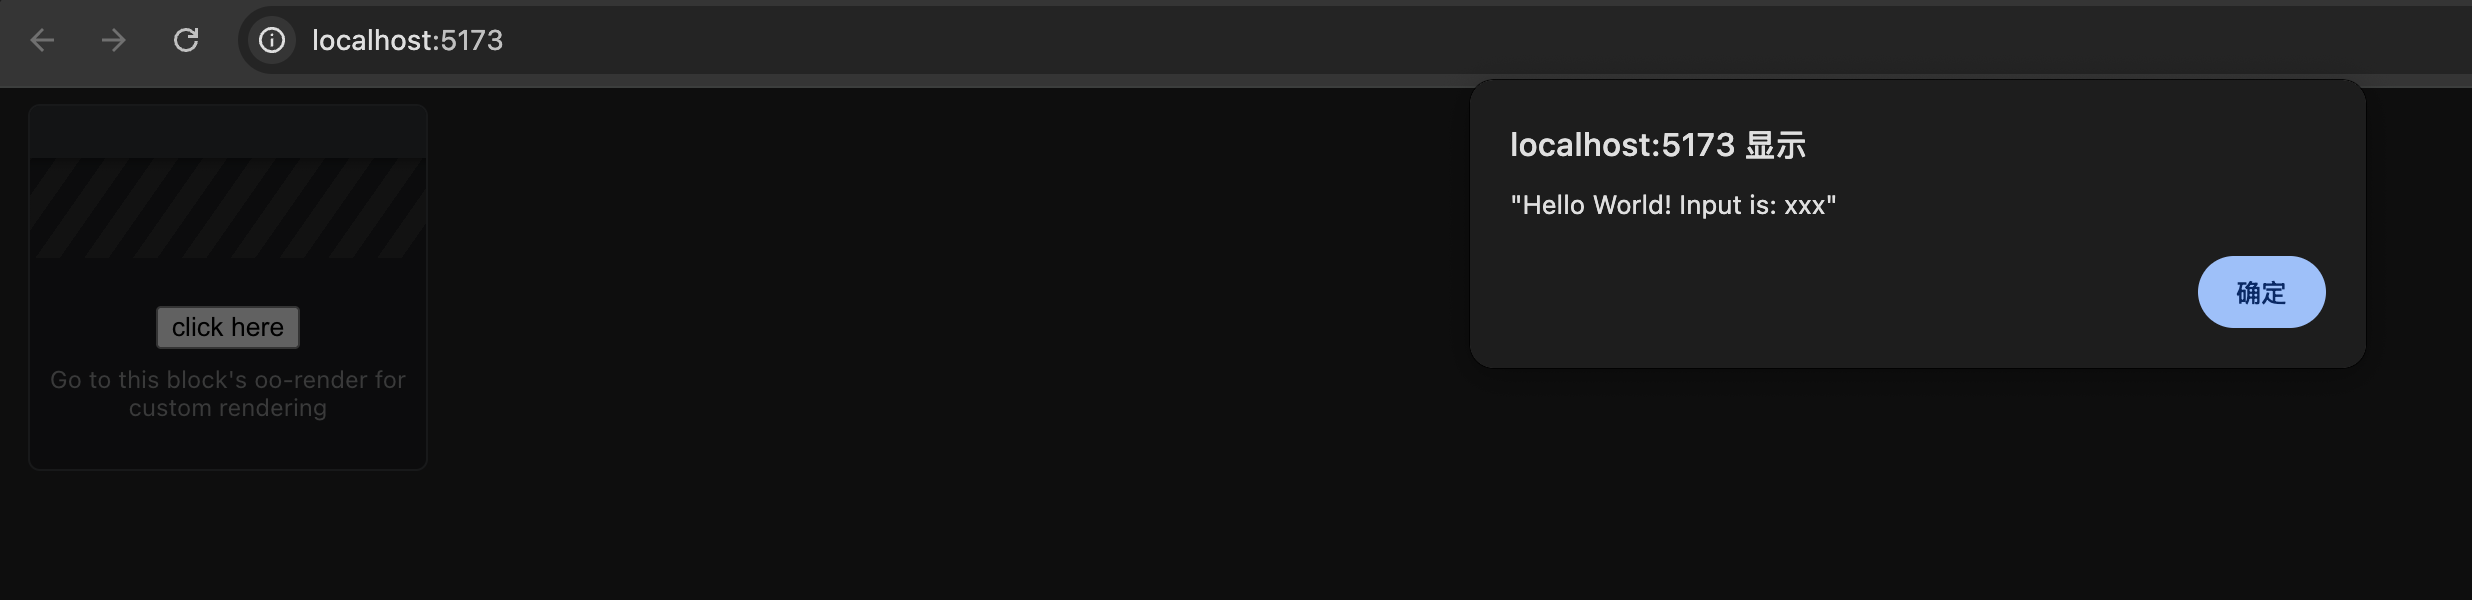
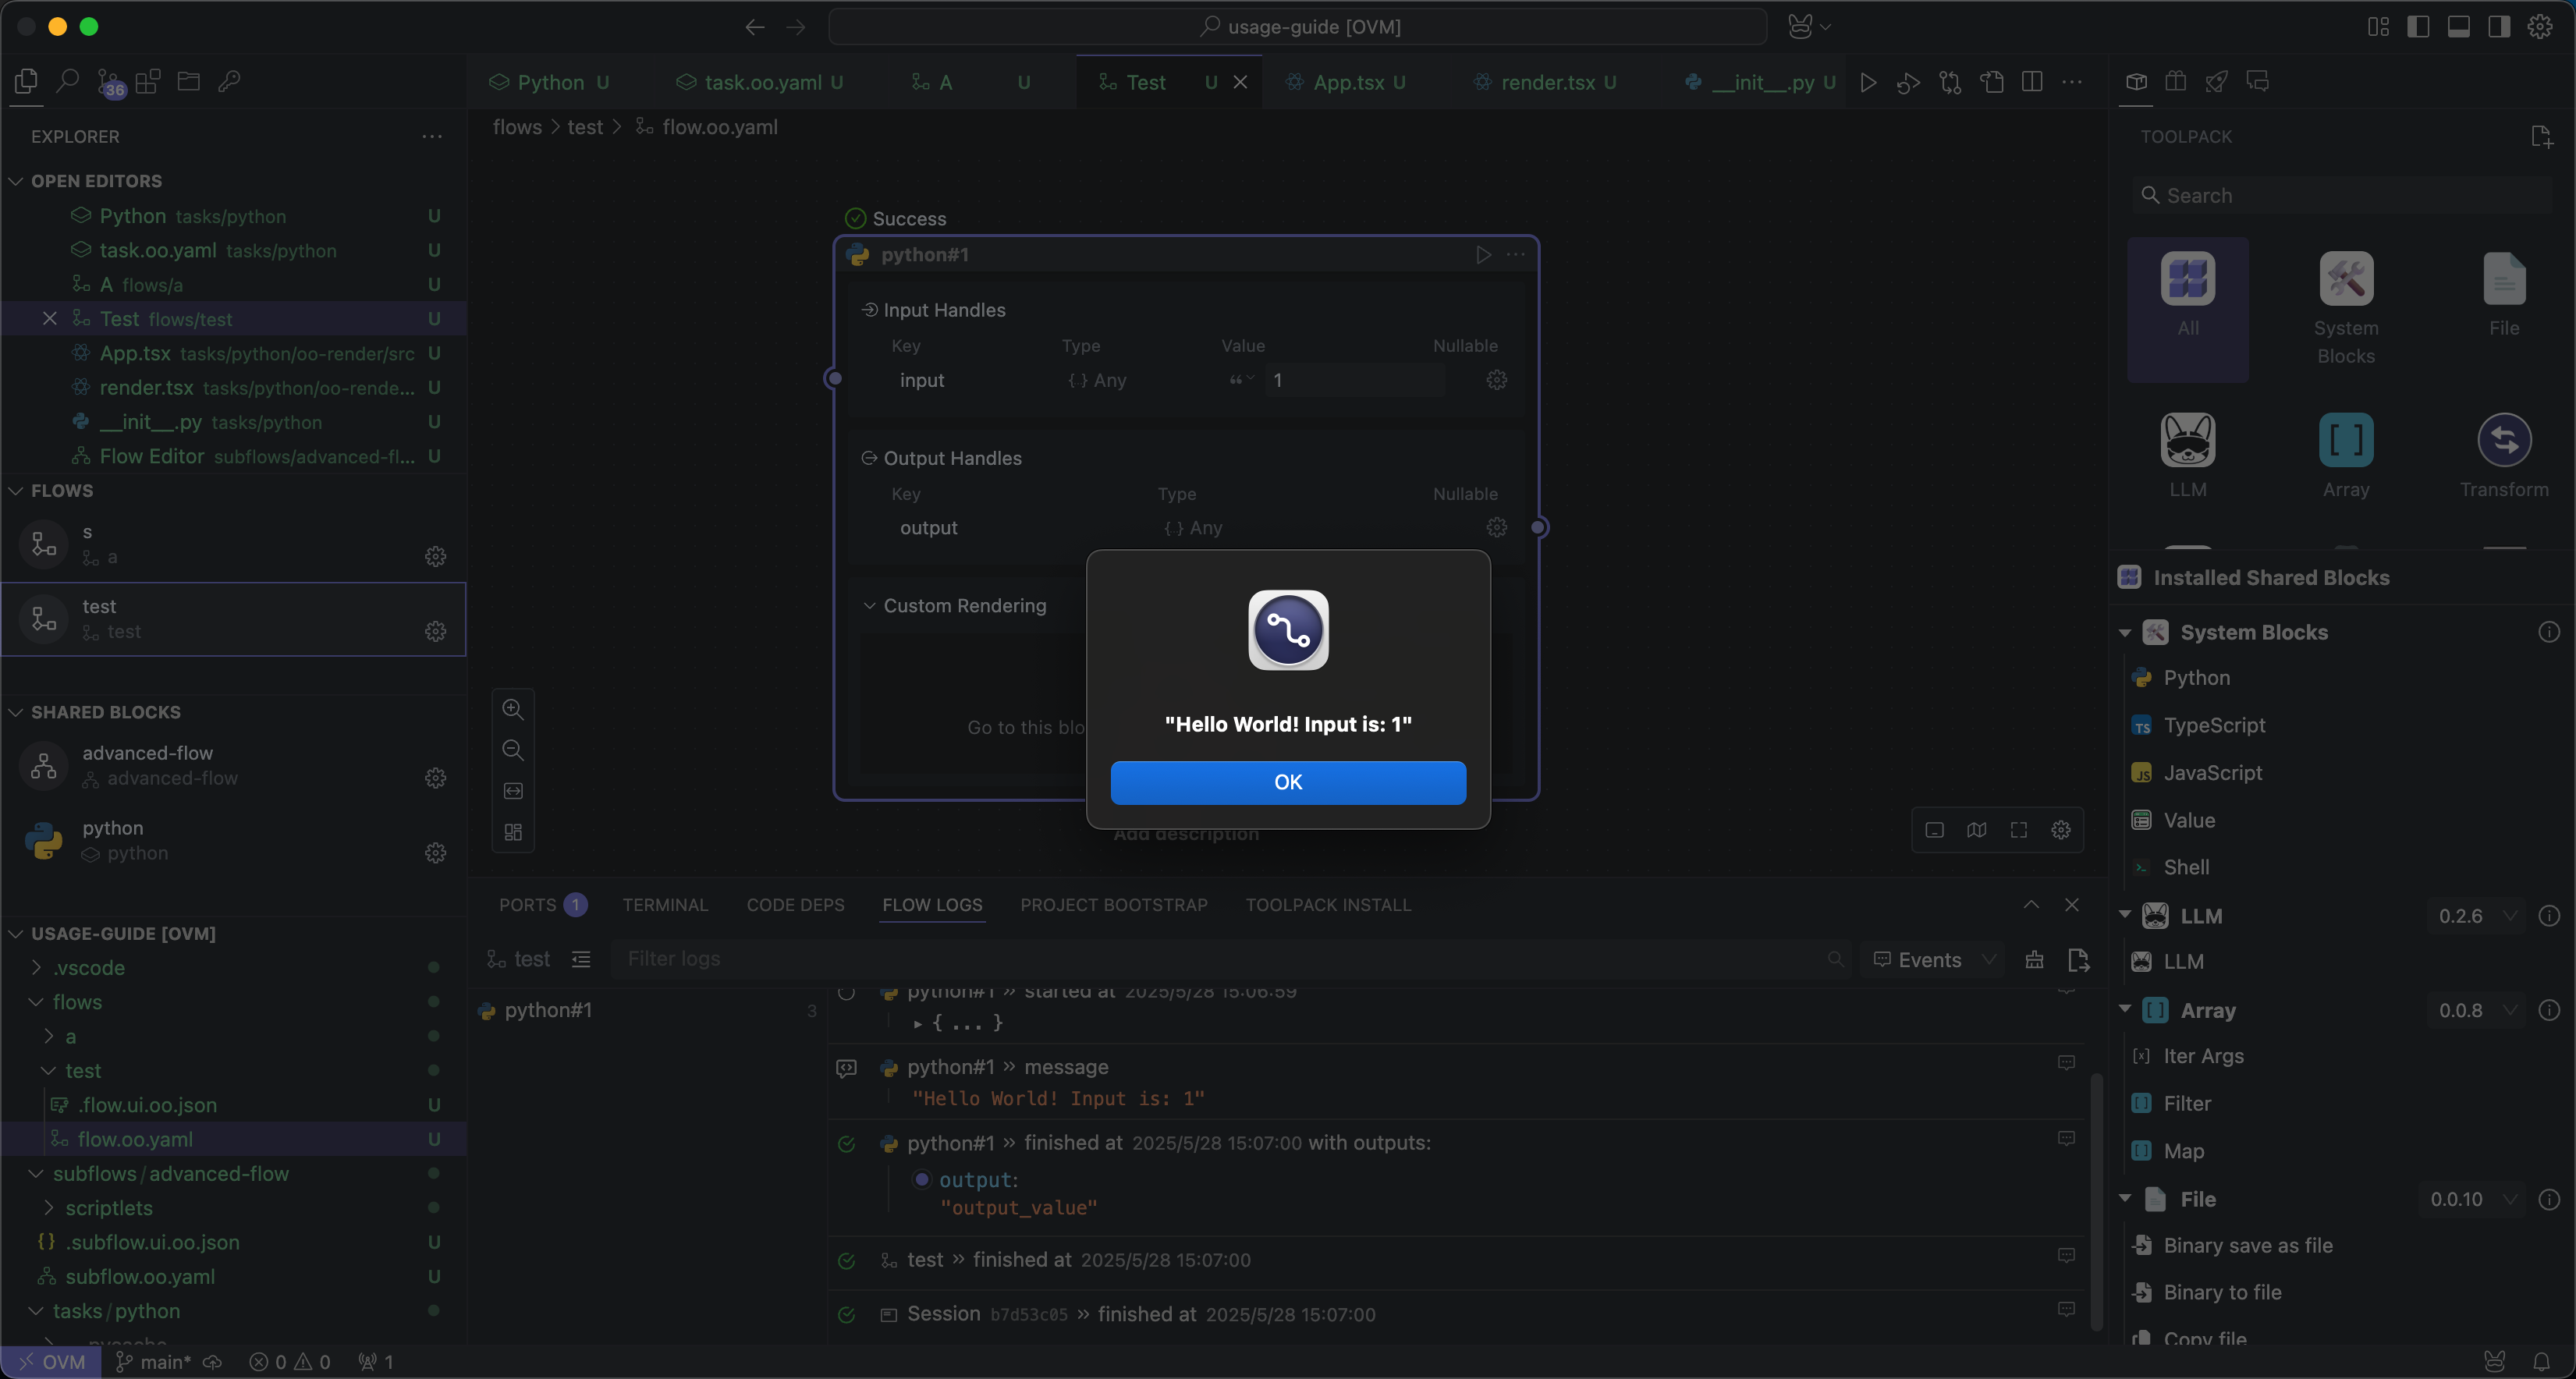
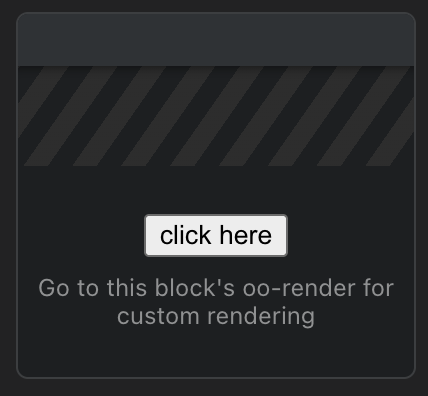
Then re-run the Block, and you can see the custom UI style:
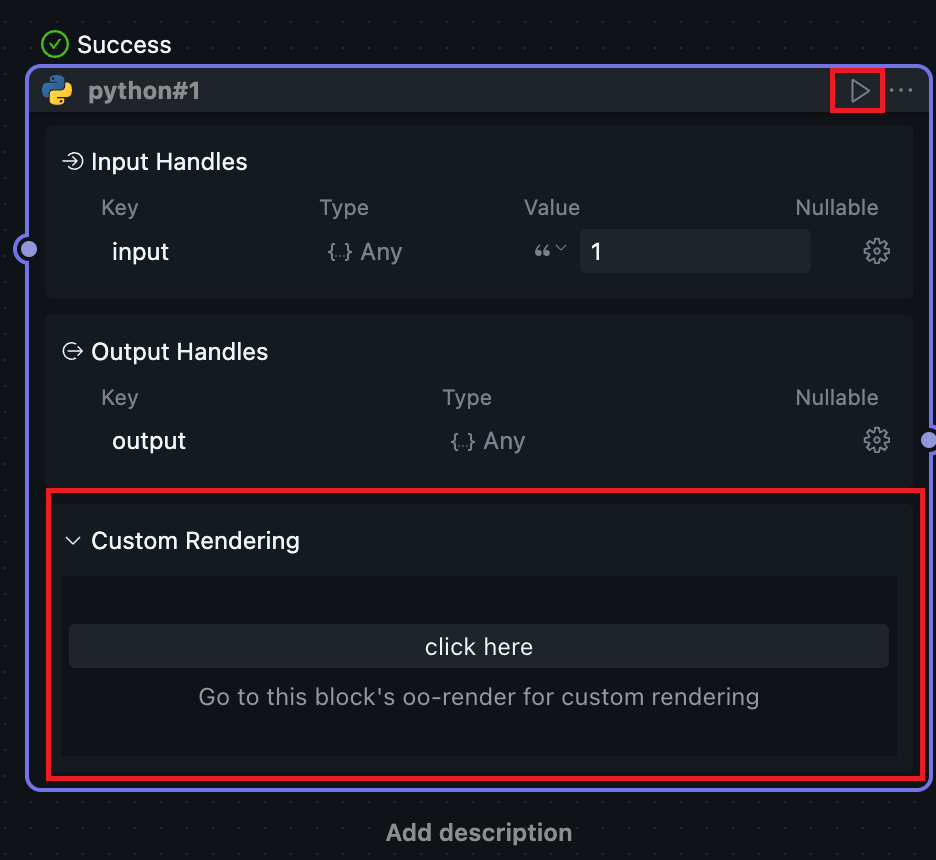
Clicking the button will show the content sent by the Block code:
Local Debugging
During the development of custom UI, we can debug the UI separately without re-running the Block each time, which can improve our development efficiency.
In the automatically generated code, you can find a dev folder, which contains content for local debugging of the custom UI.
First, we enter the custom UI directory:
Then execute in the terminal:
pnpm dev
This will open a debug window in your local browser where you can see the custom UI preview:
When we modify the custom UI code and save it, we can see the changes in real-time in this debug window without running the Block.
The styles running in the debug window may not be consistent with those running in OOMOL Studio, but this won't affect functionality. This is because VSCode registers stylesheets globally, while the browser environment doesn't have these stylesheets. Therefore, the custom UI styles should be based on what's displayed in OOMOL Studio.
You can simulate the content sent by the Block through the context.send_message() method at runtime in the dev/dev.main.tsx file.
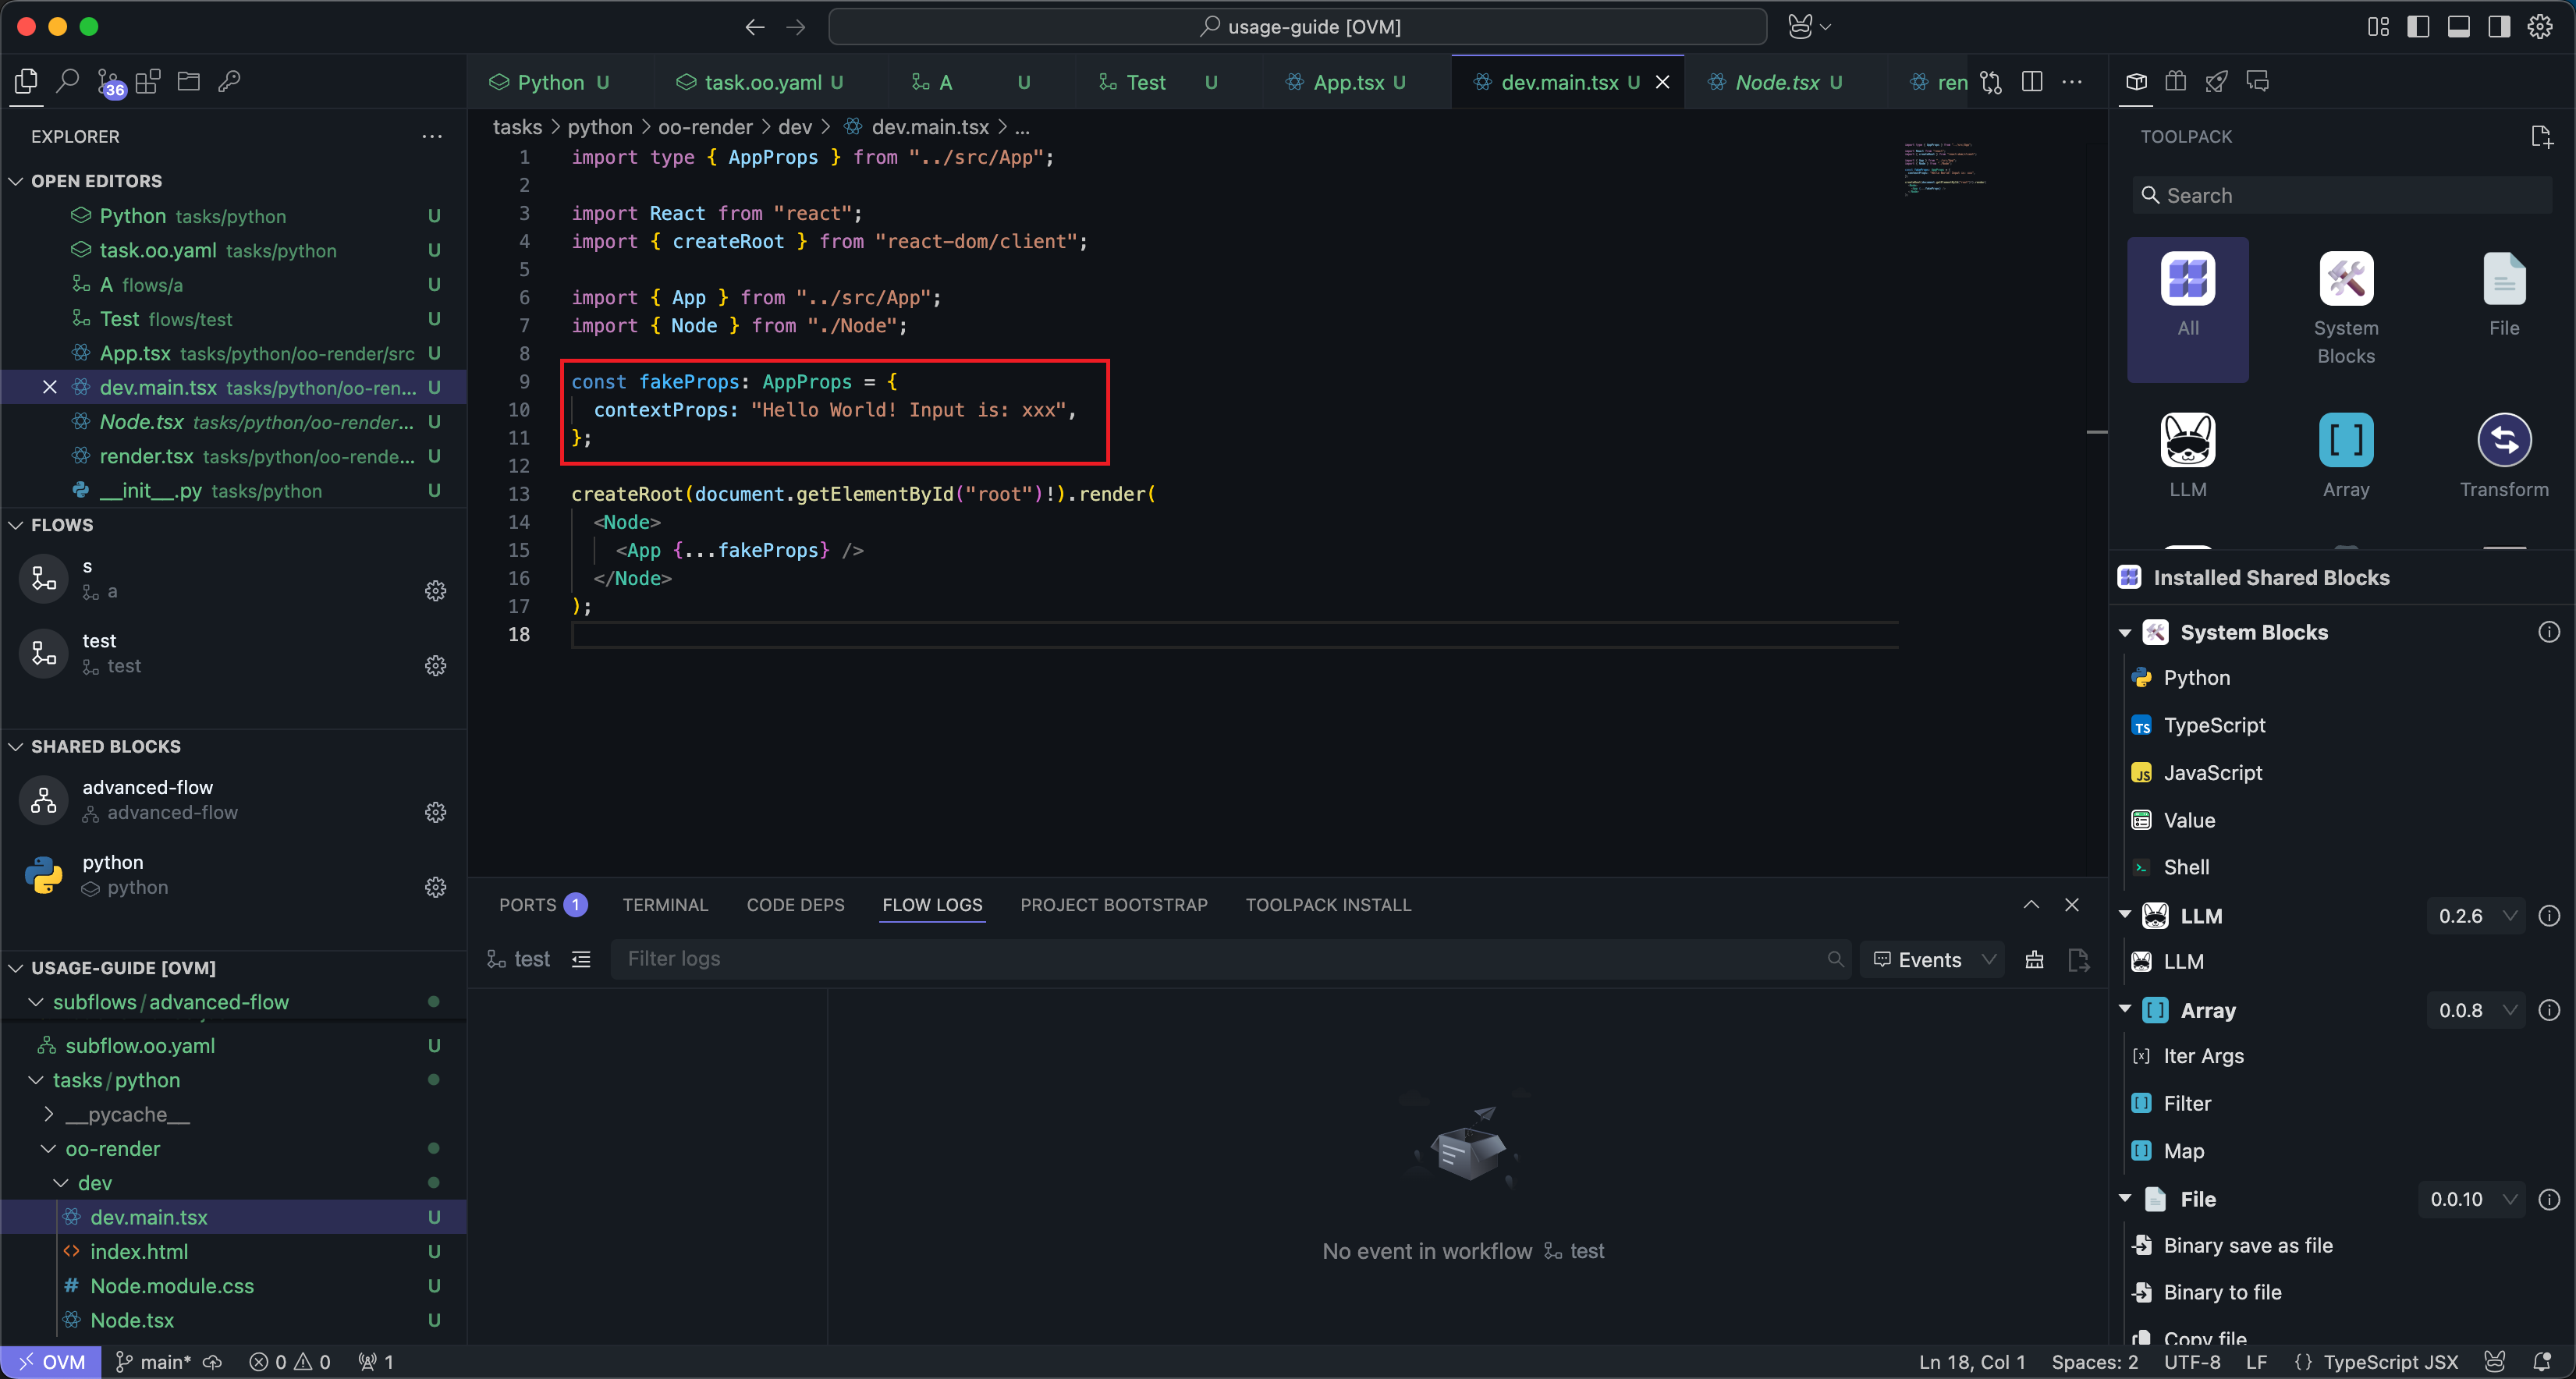
This way you can perform functional testing in the debug window: