导出镜像
选择并导出
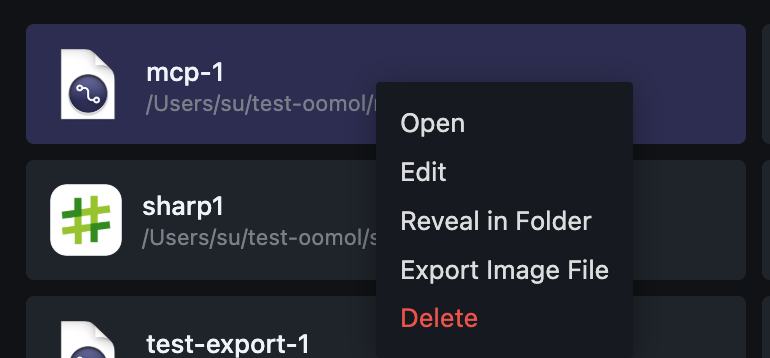
在 Home 页面中,你可以选择你想要导出项目,进行右键,选择“导出镜像文件”选项。
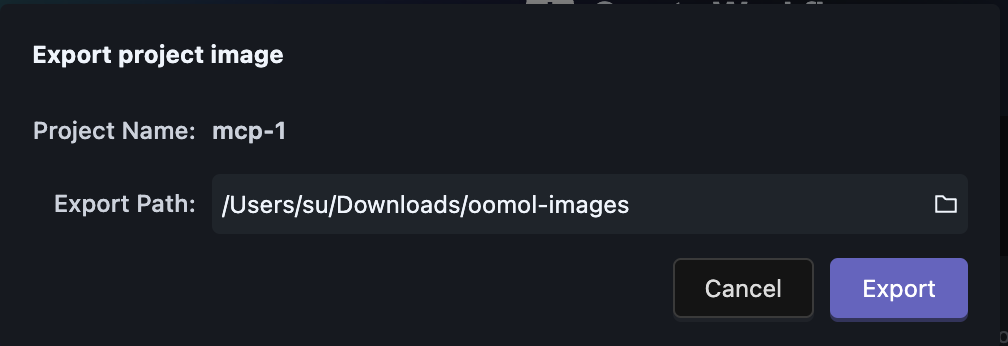
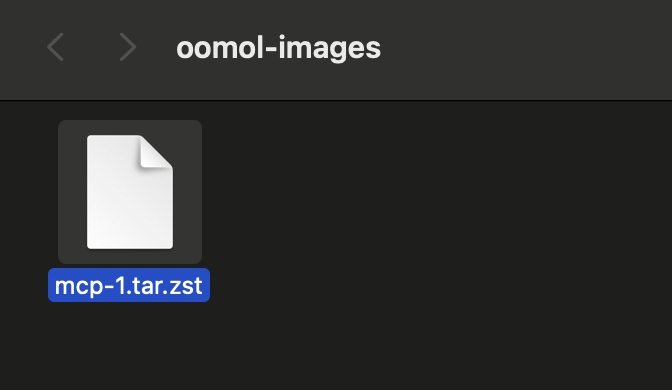
在点击“导出”后,需要等待片刻,因为导出的过程是比较耗时的。导出完成后,即可在刚刚选择的目录中找到导出的镜像文件。
导入至 Docker

你可以在终端中输入下面的命令进行导入:
docker load -i /path/to/your/image.tar.zst
当导入完成后,即可在最后一行看到导入的镜像名称,就像上图中的: Loaded image: localhost/mcp-1:latest。其中 localhost/mcp-1:latest 就是导入完成的镜像名称。
启动
在启动之前,我们需要先在: https://console.oomol.com/panel/api-key 中申请一个 API Key,以便容器内的工作流可以正常使用: Secret 、AI 等功能。
docker run --privileged -p 3000:3000 -e OOMOL_API_TOKEN={OOMOL_API_TOKEN} -v $HOME/oomol-storage:/oomol-driver/oomol-storage localhost/mcp-1:latest
- API 服务启动端口默认为
3000, 可以通过传入环境变量PORT来重新指定 - 如果当前的工作流不需要使用本地的
oomol-storage文件夹中的文件,可以不进行挂载(删除-v $HOME/oomol-storage:/oomol-driver/oomol-storage) - 挂载的目录,可以参考 空间 中列举出的
Disk。
API
查询
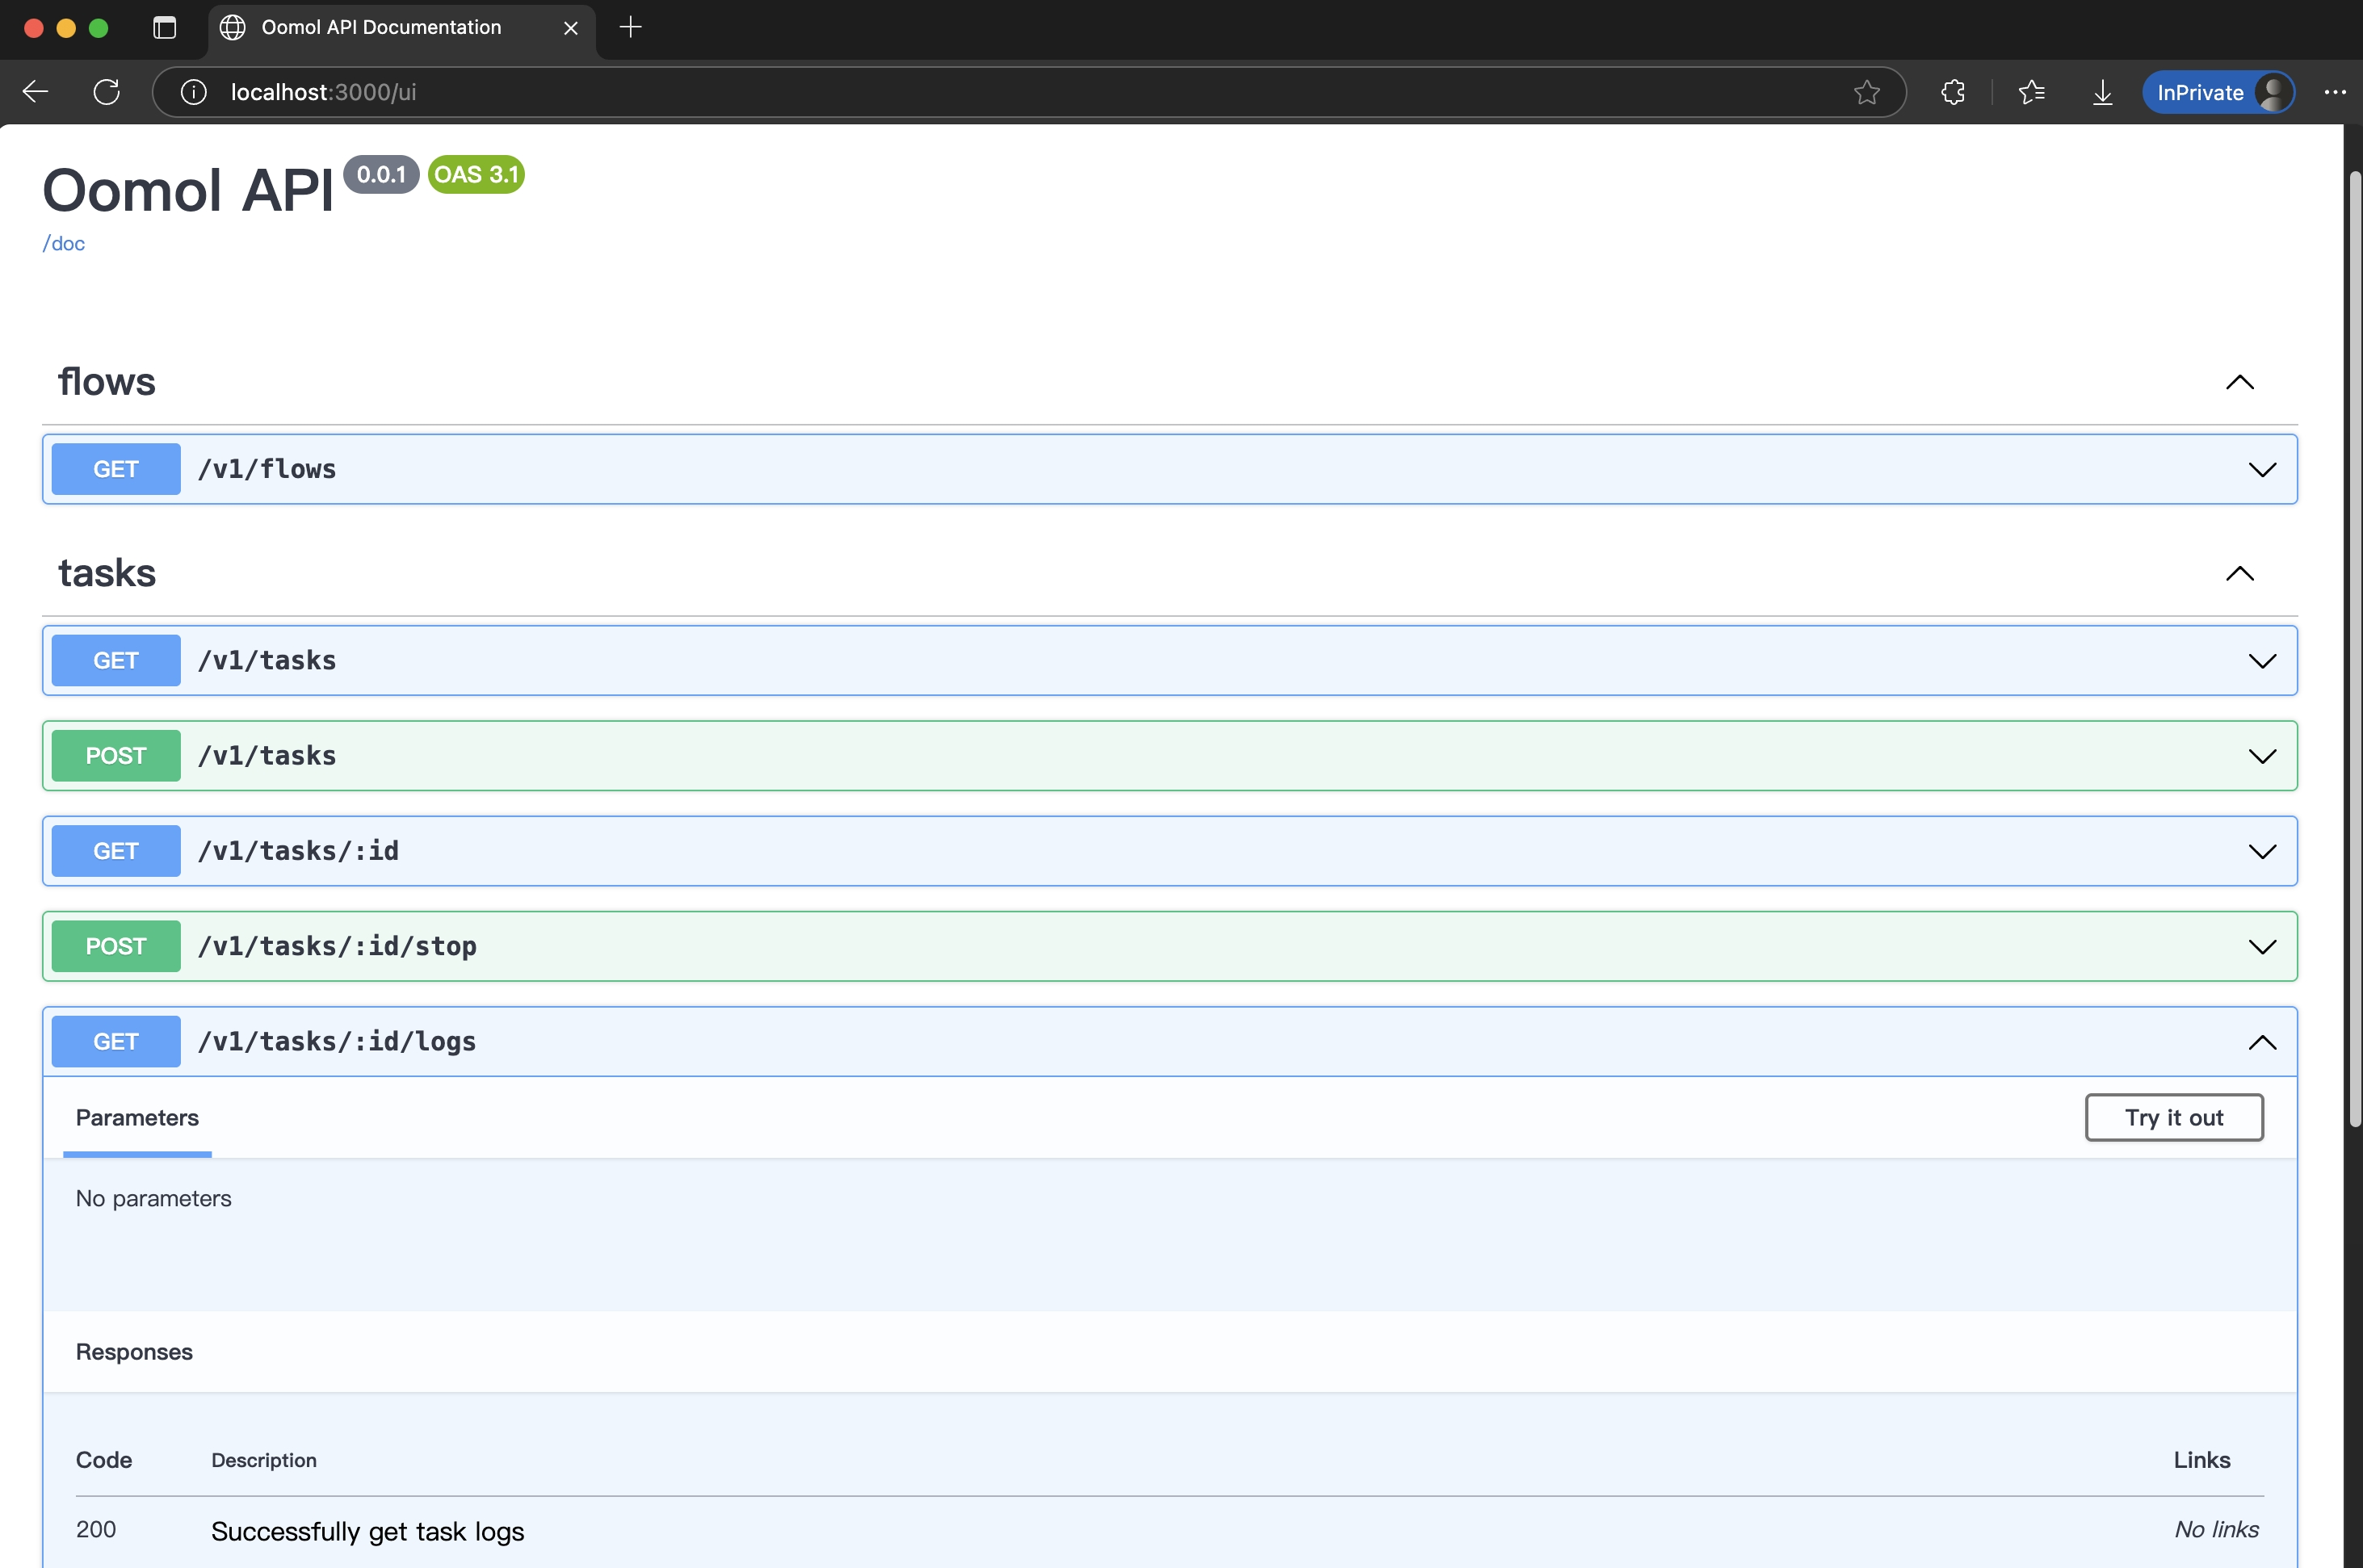
当容器启动后,你可以在浏览器中访问: http://localhost:3000/ui 来查询 API。
使用
现在你可以通过请求 http://localhost:3000/v1/flows 来查询工作流以及其参数。类似:
{
  "flows": [
    {
      "name": "zip-directory",
      "path": "/app/workspace/flows/zip-directory/flow.oo.yaml",
      "inputs": [
        {
          "nodeId": "copy_file#1",
          "inputs": [
            {
              "handle": "destination_folder",
              "json_schema": { "type": "string", "ui:widget": "dir" },
              "nullable": true,
              "value": "/oomol-driver/oomol-storage"
            }
          ]
        },
        {
          "nodeId": "zip_dir#1",
          "inputs": [
            {
              "handle": "password",
              "json_schema": { "type": "string" },
              "nullable": true,
              "value": null
            },
            {
              "handle": "zip_file_name",
              "json_schema": { "type": "string", "ui:widget": "save" },
              "nullable": true,
              "value": null
            },
            {
              "handle": "dir_to_zip",
              "description": "Input",
              "json_schema": { "type": "string", "ui:widget": "dir" }
            }
          ]
        }
      ]
    },
    {
      "name": "zip-file",
      "path": "/app/workspace/flows/zip-file/flow.oo.yaml",
      "description": "zip a file",
      "inputs": [
        {
          "nodeId": "zip_file#1",
          "inputs": [
            {
              "handle": "file_to_zip",
              "description": "Input",
              "json_schema": { "type": "string", "ui:widget": "file" }
            },
            {
              "handle": "zip_file_name",
              "json_schema": { "type": "string", "ui:widget": "save" },
              "nullable": true,
              "value": null
            },
            {
              "handle": "password",
              "json_schema": { "type": "string" },
              "nullable": true,
              "value": null
            }
          ]
        },
        {
          "nodeId": "copy_file#1",
          "inputs": [
            {
              "handle": "destination_folder",
              "json_schema": { "type": "string", "ui:widget": "dir" },
              "nullable": true,
              "value": "/oomol-driver/oomol-storage"
            }
          ]
        }
      ]
    }
  ]
}
通过上面的 JSON 我们可以观察到有一个 name 为 zip-file 的 Flow,这个 Flow 中有一个 nodeId 为 zip_file#1 的 Node,并且有一个名为 file_to_zip 的 handle 需要填值。
通过以上信息,我们就可以通过以 POST Method 请求 localhost:3000/v1/tasks 来创建一个任务,请求体为
{
  "flowName": "zip-file",
  "inputValues": [
    {
      "nodeId": "zip_file#1",
      "inputs": [
        {
          "handle": "file_to_zip",
          "value": "/oomol-driver/oomol-storage/data.csv"
        }
      ]
    }
  ]
}
当请求完成后,你会收到一个 JSON 响应,类似于:
{
  "task": {
    "id": "9a56494e-919c-44b7-b897-ca7bae9713aa",
    "project_id": "mcp-1_7691f464d9ef",
    "manifest_path": "/app/workspace/flows/zip-file/flow.oo.yaml",
    "status": "created",
    "inputValues": [
      {
        "nodeId": "zip_file#1",
        "inputs": [
          {
            "handle": "file_to_zip",
            "value": "/oomol-driver/oomol-storage/data.csv"
          }
        ]
      }
    ],
    "created_at": 1751530274000,
    "updated_at": 1751530274000
  }
}
接下来可以通过请求 localhost:3000/v1/tasks/{taskId}/logs 来查询任务执行的状况