 Leina
Leina  Wanta
Wanta OOMOL TypeScript SDK 레퍼런스
@oomol-lab/connector에는 세 가지 TypeScript 클라이언트가 포함되어 있습니다. 이 페이지의 공유 구성 및 API 레퍼런스를 사용하기 전에 제품 경로에 맞는 클라이언트를 선택하세요:
Connector는 호스팅 게이트웨이를 통해 자체 OOMOL 계정에 연결된 계정을 호출합니다.ProjectConnector는 SaaS 제품 사용자가 소유한 계정을 연결하고 호출합니다.OpenConnector는 직접 운영하는 OpenConnector 런타임을 호출합니다.
이 클라이언트들은 전송 동작, 정밀한 액션 타입, 오류 모델을 공유합니다. 키, 계정 경계, 사용 가능한 메서드는 서로 다릅니다.
패키지는 가볍고 의존성이 없으며, SDK가 각 요청을 구성하고 응답을 파싱합니다. TypeScript는 gmail.search_threads, slack.post_message, notion.append_block과 같은 액션을 직접 호출할 수 있습니다.
설치
npm install @oomol-lab/connector # or: bun add / pnpm add / yarn add내장 fetch와 AbortController를 위해 Node ≥ 18이 필요합니다. SDK는 dist만 제공하며 런타임 의존성이 없고 sideEffects: false이므로 트리 셰이킹이 깔끔하게 됩니다. Node, Bun, Deno 또는 엣지 워커와 같은 신뢰할 수 있는 서버 측 런타임에서 Connector과 ProjectConnector을 사용하세요. 브라우저 앱은 백엔드를 호출해야 하며, 개인 또는 Project API 키를 클라이언트 코드에 절대 번들하지 마세요.
세 가지 클라이언트 한눈에 보기
Connector | ProjectConnector | OpenConnector | |
|---|---|---|---|
| 인증 | 개인 api_… 키 | Project oo_proj_… 키 | 선택적 런타임 토큰 oct_… |
| 연결 대상 | OOMOL 호스팅 게이트웨이 | OOMOL 호스팅 게이트웨이 | 직접 운영하는 OpenConnector 런타임 |
| 계정 리소스 | 개인 또는 Team 연결 | 외부 사용자의 연결된 계정 | 런타임 내 연결 |
| 사용 사례 | 개인 또는 Team이 연결한 계정 호출 | SaaS 제품 사용자를 위한 계정 연결 및 호출 | 자체 호스팅 런타임 호출 |
| 통합 가이드 | Connector SDK | ProjectConnector | OpenConnector SDK |
Connector: 개인 또는 Team 연결 호출
API 키 발급
OOMOL Connector 개인 API 키가 필요하며, api_… 형태입니다. OOMOL Console에서 생성하세요:
https://console.oomol.com/api-key
환경 변수로 설정하세요. 이 가이드에서는 OOMOL_API_KEY을 사용합니다. 게이트웨이가 모든 요청을 인가하고 Authorization: Bearer <apiKey>로 키를 받습니다.
개인
api_…키는 개인 또는 Team 연결에서 액션을 실행합니다. 최종 사용자의 계정을 연결하려면 Project 키(oo_proj_…)와ProjectConnector를 사용하세요. ProjectConnector 통합 가이드를 참조하세요. 자체 호스팅 런타임을 호출하려면 선택적 런타임 토큰(oct_…)과OpenConnector을 사용하세요. OpenConnector SDK 가이드를 참조하세요.
빠른 시작
클라이언트를 생성한 후 액션을 호출하세요. 아래 두 가지 형식은 동일합니다.
import { Connector } from "@oomol-lab/connector";

const oomol = new Connector({ apiKey: process.env.OOMOL_API_KEY! });

// Path 1: dynamic string. Callable for any action id.
const { threads } = await oomol.execute("gmail.search_threads", { query: "from:boss" });

// Path 2: namespace sugar. Same call underneath.
const result = await oomol.gmail.search_threads({ query: "is:unread" });execute은 액션 출력을 직접 반환합니다. 실행 메타데이터도 함께 필요한 경우 executeRaw을 사용하세요:
const raw = await oomol.executeRaw("gmail.search_threads", { query: "from:ceo" });
raw.data;        // the same value execute() returns
raw.executionId; // server-assigned execution id (useful for support / log correlation)
raw.actionId;    // echoed action id
raw.message;     // human-readable message from the success envelope
핵심 호출 흐름은 execute과 executeRaw입니다.
Connector 개념
SDK 모델에는 다섯 가지 핵심 개념이 있습니다. 인증, 자격 증명, 제공자 호출은 게이트웨이가 처리합니다:
| 용어 | 설명 |
|---|---|
| Gateway | 이 클라이언트가 통신하는 호스팅 OOMOL Connector 서비스입니다. 자격 증명을 보관하고 실제 제공자 호출을 수행하며 균일한 봉투를 반환합니다. SDK는 통합 로직을 로컬에서 전혀 실행하지 않습니다. |
| Provider / service | 서드파티 API(gmail, slack, github, notion, …)입니다. 액션 id의 <service> 접두사입니다. |
| Action | 제공자에 대한 하나의 작업으로, "<service>.<action>"(예: gmail.search_threads)로 식별됩니다. 액션은 게이트웨이가 제공하고 클라이언트가 호출합니다. |
| Connection | 제공자에 대해 저장된, 이미 인가된 자격 증명입니다. 토큰을 직접 다루지 않으며 connectionName를 통해 사용할 연결을 지정합니다. OAuth와 자격 증명 수명 주기는 게이트웨이의 역할입니다. |
| Team | x-oo-team-name 헤더로 전송되는 선택적 테넌트 범위 지정입니다. |
동일한 용어가 SDK 표면으로 이어집니다: 액션 id는 항상 "<service>.<action>"이고, connectionName은 저장된 연결을 선택하며, 프로젝트 클라이언트의 경우 externalUserId이 최종 사용자 중 한 명을 식별합니다.
일반 작업
| 하고 싶은 것… | 사용 | 참고 |
|---|---|---|
| 모델링된 액션 실행 | execute / executeRaw | 타입이 지정된 원라이너. executeRaw은 { executionId, actionId, message }도 반환합니다. |
| 아직 액션으로 모델링되지 않은 엔드포인트 호출 | proxy | 업스트림 API로의 패스스루이며, 연결의 자격 증명은 게이트웨이가 주입합니다. |
| LLM에 액션 제공 / 동적 폼 구축 | catalog | 모든 액션 또는 제공자에 대한 런타임 JSON Schema(2020-12). |
| 연결된 항목 검색 | apps.list | 이미 연결한 연결의 읽기 전용 목록입니다. |
| 사용자가 자신의 계정을 연결하도록 허용 | ProjectConnector | 최종 사용자를 대신해 계정을 연결하고 그들을 위해 액션을 실행하는 별도의 프로젝트 범위 클라이언트입니다. |
제공자와 작업 지원 범위는 게이트웨이가 제공합니다. OOMOL 공개 카탈로그 API에서 카탈로그 전체의 제공자 및 작업 수를 확인하거나 앱 디렉터리를 살펴보세요. 설정한 게이트웨이의 제공자는 런타임에 oomol.catalog.providers()로 확인할 수 있습니다. 호출 가능한 작업은 계정 인가 및 접근 정책에 따라 달라집니다.
정밀한 타입(선택 사항)
동적 문자열 경로는 모든 actionId에 대해 컴파일됩니다. 기본적으로 모든 액션은 느슨하게 타입이 지정되며(Record<string, any> 입력 및 출력), 이는 새 액션을 즉시 호출 가능하게 유지합니다. JSDoc과 함께 액션별 정밀한 입력/출력 타입을 사용하려면 동반 타입 패키지를 설치하고 사용하는 제공자당 하나의 사이드 이펙트 임포트를 추가하세요:
import { Connector } from "@oomol-lab/connector";
import "@oomol-lab/connector-types/gmail";   // precise types + JSDoc for gmail.*
import "@oomol-lab/connector-types/slack";   // …and slack.*

const oomol = new Connector({ apiKey: process.env.OOMOL_API_KEY! });

await oomol.gmail.search_threads({ query: "from:boss" }); // input + output now precise
await oomol.notion.append_block({ pageId, text });        // notion not imported → still loosely callable
npm install -D @oomol-lab/connector-types정밀한 타입은 @oomol-lab/connector-types과 사이드 이펙트 임포트에서 오며, 프로젝트에 생성된 파일이 남지 않습니다. 등록된 액션은 리터럴 완성과 정확한 입력/출력 타입을 얻습니다. 등록되지 않은 액션은 Record<string, any>로 저하됩니다. 타입 패키지가 백엔드보다 뒤처지면 새 액션은 느슨한 폴백을 통해 호출 가능하게 유지됩니다. 코어 런타임과 타입 패키지는 별도로 릴리스됩니다.
서브패스 임포트(
@oomol-lab/connector-types/gmail)가 해석되도록moduleResolution을bundler,node16또는nodenext으로 설정해야 합니다. 설정 세부 정보는@oomol-lab/connector-types저장소를 참조하세요.
구성
apiKey을 제외한 모든 필드는 선택 사항입니다:
new Connector({
  apiKey: process.env.OOMOL_API_KEY!,        // required
  baseUrl: "https://connector.oomol.com/v1", // default
  team: "acme",                              // default team → x-oo-team-name
  connectionName: "work",                    // default connection (prefer per-call / using())
  timeoutMs: 30_000,                         // default per-request timeout
  maxRetries: 2,                             // default; retries 429 / 5xx / network with backoff + jitter
  fetch: customFetch,                        // inject for tests / proxies / tracing
});| 필드 | 기본값 | 참고 |
|---|---|---|
apiKey | — | 필수. Authorization: Bearer <apiKey>으로 전송됩니다. |
baseUrl | https://connector.oomol.com/v1 | 클라이언트 구성에서 명시적으로 재정의합니다. |
team | — | 호출이 실행되는 테넌트입니다. |
connectionName | — | 제공자에 연결이 두 개 이상 있을 때 사용할 저장된 연결입니다. 간단한 설정에서는 클라이언트 기본값으로 사용하고, 여러 연결이 있는 경우 호출별로 또는 using()을 통해 설정하세요. |
timeoutMs | 30_000 | 요청당 타임아웃(밀리초)입니다. |
maxRetries | 2 | 지수 백오프와 지터를 사용하여 429 / 5xx / 네트워크 오류에서 재시도합니다. |
fetch | 전역 fetch | 테스트, 프록시 에이전트 또는 추적을 위해 사용자 지정 fetch를 주입합니다. |
gmail.send_email 또는 slack.post_message과 같이 부작용이 있는 액션의 경우, 해당 액션이 검증한 멱등성 메커니즘을 제공하지 않는 한 { retries: 0 }을 전달하세요. 제공자가 요청을 수락한 후 네트워크 오류가 발생할 수 있으므로 자동 재시도가 작업을 반복할 수 있습니다.
범위 및 호출별 옵션
세 계층이 다음 우선순위로 해석됩니다: 호출별 옵션 > using() 범위 > 클라이언트 기본값.
using()은 주어진 기본값을 병합한 불변의 범위 지정 서브 클라이언트를 반환하며, 원래 클라이언트는 변경되지 않습니다:
const work = oomol.using({ connectionName: "work", team: "acme" });
await work.gmail.search_threads({ query: "label:urgent" }); // runs under "work" / "acme"
호출별 옵션은 해당 호출에만 적용되며 가장 높은 우선순위를 가집니다:
await oomol.execute(
  "gmail.search_threads",
  { query: "from:ceo" },
  {
    team: "acme",           // override team for this call
    connectionName: "alt",  // pick a different connection for this call
    timeoutMs: 10_000,      // tighter timeout for this call
    retries: 0,             // disable retries for this call
    signal: controller.signal, // forward an AbortSignal
  },
);connectionName은 동일한 계층 구조로 해석됩니다. 이는 x-oo-connector-alias 헤더로 전송되며(게이트웨이 필드 이름은 alias), SDK 표면에서는 connectionName을 사용합니다.
프록시: 업스트림 엔드포인트 직접 호출
proxy은 업스트림 API 엔드포인트를 직접 호출합니다. 게이트웨이는 선택한 연결의 자격 증명을 주입하며, 요청과 응답은 업스트림 API 형태를 유지합니다.
// Typed GET. The request path uses the `endpoint` field.
const repos = await oomol.proxy<Array<{ name: string }>>("github", {
  endpoint: "/user/repos",
  method: "GET",
  query: { per_page: 5, sort: "updated" },
});
repos.status;               // upstream HTTP status
repos.data.map((r) => r.name);

// POST with a body and upstream headers; these headers go to the provider.
await oomol.proxy("github", {
  endpoint: "/repos/acme/widgets/issues",
  method: "POST",
  headers: { "X-GitHub-Api-Version": "2022-11-28" },
  body: { title: "Tracking issue", labels: ["chore"] },
});endpoint는 경로(제공자의 기본 URL을 기준으로 해석됨) 또는 전체 URL을 허용하며, https://eu.posthog.com/api/...과 같이 지역별 호스트가 있는 제공자에 유용합니다. method은 GET | POST | PUT | PATCH | DELETE 중 하나입니다. 응답은 { status, headers, data }입니다. 프록시 본문은 백엔드에서 엄격하게 처리됩니다: 알 수 없는 최상위 키는 invalid_input로 거부됩니다.
카탈로그: 제공자 및 액션 검사
카탈로그는 동적 폼, 검증, LLM 도구 정의를 위한 읽기 전용 런타임 메타데이터를 제공합니다. 입력/출력 스키마는 JSON Schema(2020-12)를 사용하며 컴파일 타임 타입 패키지와 독립적입니다.
// List providers; optionally narrow server-side.
const all = await oomol.catalog.providers();                       // every provider
const mailish = await oomol.catalog.providers({ q: "mail" });      // free-text search → ?q=
const some = await oomol.catalog.providers({ service: ["gmail", "slack"] }); // restrict → ?service=…

// All actions of one service.
const actions = await oomol.catalog.actions("gmail");

// Full metadata for one action, including runtime JSON Schema.
const meta = await oomol.catalog.action("gmail.search_threads");
meta.name;          // human-readable name
meta.requiredScopes;// OAuth scopes the action needs
meta.inputSchema;   // JSON Schema (2020-12) for the input
meta.outputSchema;  // JSON Schema (2020-12) for the output
각 제공자는 { service, displayName, iconUrl, homepageUrl, categories, authTypes }을 포함합니다.
Apps: 연결된 계정 목록
apps.list()은 게이트웨이가 이미 보유한 연결의 읽기 전용 보기를 반환합니다. 연결 생성 및 제거는 Console에서 수행됩니다.
const apps = await oomol.apps.list();
for (const app of apps) {
  // { id, service, status, connectionName, … }; connectionName is null when none is set.
  console.log(`${app.service}: id=${app.id} status=${app.status} connectionName=${app.connectionName}`);
}

// Target a specific connection by passing its connectionName back as the per-call selector.
const work = apps.find((a) => a.connectionName === "work");
if (work) {
  await oomol.execute("gmail.search_threads", { query: "is:unread" }, { connectionName: "work" });
}
오류 처리
실패 시 타입이 지정된 ConnectorError가 발생합니다. 호출자 취소(중단된 AbortSignal)는 표준 AbortError로 거부되므로 게이트웨이 또는 전송 오류와 별도로 처리할 수 있습니다.
import { Connector, ConnectorError, isRetryable } from "@oomol-lab/connector";

try {
  await oomol.slack.post_message({ channel: "#general", text: "shipped" });
} catch (err) {
  if (err instanceof ConnectorError) {
    err.code;        // discriminable union, e.g. "rate_limited", "credential_expired"
    err.status;      // HTTP status (0 for client-side / network errors)
    err.requestId;   // failure-correlation id
    err.actionId;    // when applicable
    err.executionId; // when applicable
    err.data;        // upstream response body, e.g. on provider_error
    if (isRetryable(err)) {
      // 429 / 5xx / network / rate_limited / proxy_upstream_timeout / request_in_progress
    }
  } else {
    throw err; // non-ConnectorError, e.g. AbortError from caller cancellation; rethrow
  }
}err.code는 개방형 유니온입니다: 알려진 백엔드 코드는 자동 완성을 제공하고, 새 백엔드 코드는 여전히 문자열로 전달됩니다. 처리할 때 기본 분기를 유지하세요. 그룹별 일반적인 코드:
| 그룹 | 코드 |
|---|---|
| 입력 / 요청 | invalid_input, invalid_request_payload, invalid_request_signature |
| 앱 / 제공자 | app_not_found, app_not_ready, app_auth_type_mismatch, provider_not_found, provider_not_configured, provider_config_not_found, provider_error, profile_not_found |
| 자격 증명 / 인증 | credential_expired, scope_missing, user_oauth_client_required |
| 연결 선택 | connection_ambiguous, connection_account_conflict, connection_alias_conflict, connection_request_not_found, connected_account_not_found |
| 프록시 | proxy_not_supported, proxy_upstream_error, proxy_upstream_timeout, proxy_response_too_large |
| 속도 / 동시성 | rate_limited, request_in_progress, request_key_conflict, request_key_used |
| 클라이언트 전용(상태 0, 요청 미전송 또는 전송 실패) | client_invalid_request, client_timeout, client_network_error, client_wait_timeout |
isRetryable(err)는 rate_limited, proxy_upstream_timeout, request_in_progress, HTTP 429, 모든 5xx, 전송 실패(상태 0)에 대해 true을 반환합니다. 클라이언트 검증 오류(client_invalid_request)와 waitForConnection 상한(client_wait_timeout)에 대해서는 false을 반환하며, 이러한 경우 일반적으로 호출 또는 대기 흐름을 변경해야 합니다.
취소 및 타임아웃
취소하려면 AbortSignal를 전달하고, 단일 호출을 제한하려면 timeoutMs를 설정하세요. 내장 재시도 계층이 일시적 실패를 처리합니다. 단일 결정적 시도에는 retries: 0을 사용하세요.
const controller = new AbortController();
setTimeout(() => controller.abort(), 50);
try {
  await oomol.execute("gmail.search_threads", { query: "huge" }, { signal: controller.signal });
} catch (err) {
  (err as Error).name; // "AbortError"
}ProjectConnector: 제품 사용자를 위한 계정 연결
Connector는 자신의 연결에서 액션을 실행합니다. ProjectConnector은 SaaS 제품을 위한 것입니다: 귀하의 최종 사용자가 자신의 Gmail / Slack / GitHub / … 계정을 앱을 통해 연결하고, 백엔드가 그들을 대신해 액션을 실행합니다. 이는 Composio 및 Pipedream Connect와 같은 제품에서 사용하는 관리형 인증 모델입니다.
OAuth의 경우 사용자는 게이트웨이 호스팅 페이지에서 인가하며, 제공자 토큰은 게이트웨이에 남아 있고 코드는 불투명 식별자를 보유합니다. project.connect.apiKey과 project.connect.customCredential는 다릅니다: 신뢰할 수 있는 백엔드가 사용자의 비밀을 받아 게이트웨이로 보냅니다. 이러한 비밀을 브라우저, 프롬프트, 모델 컨텍스트, 로그에서 제외하세요.
최종 사용자 식별자
**externalUserId**는 프로젝트 클라이언트의 사용자 격리 키입니다. 일반적으로 자체 사용자 데이터베이스에서 선택합니다. 계정 연결, 연결 대기, 액션 실행과 같은 프로젝트 작업은 이 키로 범위가 지정됩니다. 동일한 externalUserId을 일관되게 전달하면 게이트웨이가 각 사용자의 연결을 격리하여 유지합니다.
프로젝트 클라이언트 생성
ProjectConnector은 Project API 키(oo_proj_…)로 생성된 별도의 클라이언트입니다. connect.*, waitForConnection, getUserProfile, execute, executeRaw, forUser와 같은 Project 범위 작업을 제공합니다.
import { ProjectConnector } from "@oomol-lab/connector";

const project = new ProjectConnector({ apiKey: process.env.OOMOL_PROJECT_API_KEY! }); // oo_proj_...
Console 설정이 먼저입니다. 백엔드가 계정을 연결하기 전에 관리자가 OOMOL Console에서 Project, 제공자 구성, Project API 키를 생성합니다. 일회성 설정과 이에 대응하는 백엔드 REST 흐름은 Connector for SaaS 가이드에서 다룹니다. 이 SDK는 동일한 런타임 API에 대한 타입이 지정된 래퍼입니다.
OAuth: 링크 생성 후 완료 대기
OAuth는 두 단계로 진행됩니다: 대기 중인 연결 요청을 생성하고, 사용자를 인가로 보낸 다음, 완료를 기다립니다.
// 1. Create a pending connection request for one of your users.
const request = await project.connect.oauth("user_42", {
  service: "gmail",
  connectionName: "work",                          // the name to assign; reuse it later to target this account
  returnUri: "https://app.example.com/connected",  // where the gateway returns the user after the callback
});

// 2. Send your user to the provider's authorization page.
redirectUserTo(request.authorizationUrl);

// 3. Poll until the user finishes (or it fails / expires). Returns the final connection request.
const connected = await project.waitForConnection(request);
connected.status;             // "connected" | "failed" | "expired"
connected.connectedAccountId; // the stored account id once connectedauthorizationUrl은 먼저 프로젝트와 사용자가 인가하려는 제공자를 명시하는 Connector 호스팅 진입 페이지를 연 다음, 사용자를 제공자의 OAuth 페이지로 보냅니다.
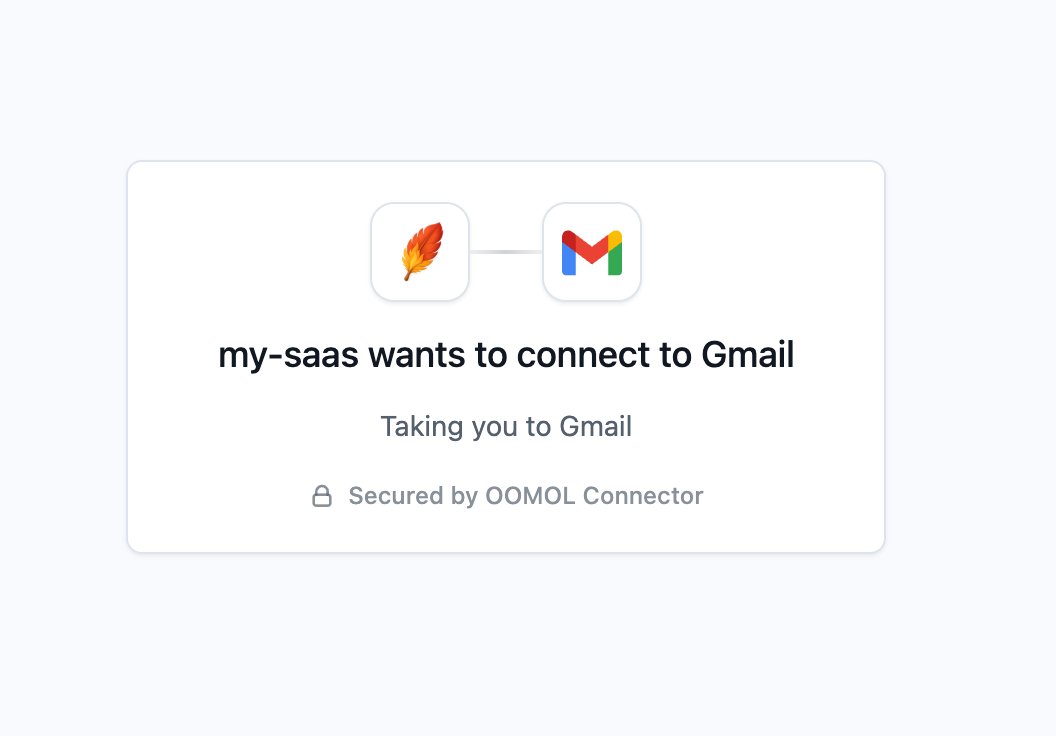
waitForConnection은 요청이 initiated 상태를 벗어날 때까지 폴링하여 반환합니다. 사용자가 인가를 완료하지 않으면 요청은 자연스럽게 expired가 됩니다. maxWaitMs(기본 600_000ms, 요청 만료와 일치)이 먼저 경과하면 코드 client_wait_timeout과 함께 ConnectorError가 발생합니다. 중단된 signal은 표준 AbortError로 거부됩니다.
returnUri가 호출되면 게이트웨이가 콜백 페이지에서 읽을 수 있는 쿼리 매개변수를 추가합니다:
status=success
service=gmail
providerConfigId=pc-1
externalUserId=user_42
connectedAccountId=ca-1
…또는 취소 / 제공자 오류의 경우:
status=error
code=<connector-error-code>
message=<human-readable-message>
API 키 / 사용자 지정 자격 증명: 동기
API 키 및 사용자 지정 자격 증명 연결은 계정을 즉시 반환합니다. OAuth만 waitForConnection가 필요합니다.
// The end user's own upstream key (e.g. an OpenAI sk-…), not your oo_proj_ key.
const account = await project.connect.apiKey("user_42", { service: "openai", apiKey: "sk-..." });
account.available; // whether the account can execute actions right now

// Provider-specific credential fields, validated by the gateway against the provider config.
await project.connect.customCredential("user_42", {
  service: "jira",
  values: { email: "user@acme.com", token: "..." },
});
모든 connect.* 호출은 service 또는 providerConfigId 중 정확히 하나로 제공자를 식별합니다. 프로젝트에 동일한 서비스에 대한 구성이 두 개 이상 있으면 providerConfigId을 사용하고, service은 간단한 경우입니다.
누구로 연결했나요?
getUserProfile는 연결된 계정 뒤의 서드파티 계정 보유자, 즉 제공자에서 최종 사용자가 실제로 누구인지 읽습니다. 게이트웨이는 이를 제공자로부터 실시간으로 가져와 제공자 간에 하나의 형태로 정규화합니다.
const { service, profile, fetchedAt } = await project.getUserProfile(account.connectedAccountId);

profile.id;          // stable provider-side user id
profile.kind;        // "user" | "bot" | "service_account" | "unknown" (open union)
profile.username;    // handle, or null
profile.displayName; // display name, or null
profile.avatarUrl;   // avatar URL, or null
profile.email;       // email, or null when the granted scopes do not expose it
profile.metadata;    // provider-specific fields the gateway exposes
제공자가 생략하거나 부여된 범위가 포함하지 않는 필드(email이 가장 흔함)는 응답에 null 값으로 남아 있습니다. fetchedAt은 게이트웨이가 프로필을 읽은 시점의 Unix 타임스탬프(밀리초)입니다. connect.apiKey / connect.customCredential 결과 또는 connected에 도달한 ConnectionRequest에서 connectedAccountId를 전달하세요. 알 수 없는 id는 connected_account_not_found로 거부되고, userProfile 기능이 없는 제공자는 profile_not_found로 거부되며, 비활성 또는 사용 불가능한 계정은 app_not_ready, app_auth_type_mismatch 또는 credential_expired로 거부될 수 있습니다. 범위 지정 서브 클라이언트에도 있습니다: user.getUserProfile(connectedAccountId).
사용자를 대신해 실행
// The provider service is derived from the actionId prefix ("gmail").
// Without connectionName / connectedAccountId, the user's latest active account is used.
const out = await project.execute(
  "user_42",
  "gmail.search_threads",
  { query: "is:unread" },
  { connectionName: "work" },
);
계정 선택 우선순위: connectedAccountId(특정 계정)이 connectionName(이름으로 계정)을 이깁니다. 둘 다 없으면 게이트웨이는 해당 제공자에 대해 사용자의 최신 활성 계정을 사용합니다. project.executeRaw는 개인 클라이언트와 동일한 { data, executionId, actionId, message } 봉투를 반환합니다.
한 사용자로 범위 지정
forUser은 externalUserId를 한 번 바인딩하여 이후 호출에서 id를 반복하지 않도록 합니다:
const user = project.forUser("user_42");
const request = await user.connect.oauth({ service: "slack" });
const slack = await user.waitForConnection(request);
if (slack.status === "connected") {
  await user.execute(
    "slack.post_message",
    { channel: "#general", text: "shipped" },
    { connectedAccountId: slack.connectedAccountId },
  );
}project.execute는 개인 경로와 동일한 @oomol-lab/connector-types 레지스트리를 재사용합니다: 임포트한 제공자는 정밀한 입력/출력을 얻고, 나머지는 느슨하게 호출 가능하게 유지됩니다.
인가 요청 및 계정 수명 주기
| 객체 | 얻는 시점 | 주요 필드 |
|---|---|---|
ConnectionRequest | connect.oauth이 반환하며, getConnectionRequest / waitForConnection을 통해 다시 읽음 | id, status(initiated → connected / failed / expired), authorizationUrl, connectedAccountId, externalUserId, connectionName, expiresAt |
ConnectedAccount | connect.apiKey / connect.customCredential가 동기적으로 반환하며, 완료된 OAuth 요청이 가리킴 | id / connectedAccountId, status(active, reauth_required, error, disconnected), available, externalUserId, connectionName, service |
available은 실행에 필요한 모든 것이 갖춰졌을 때만 true입니다: 제공자 구성이 활성이고, 계정이 활성이며, 기본 앱이 활성이고, 자격 증명이 존재하는 경우입니다. 두 상태 필드 모두 개방형 유니온입니다. 새 백엔드 상태를 처리하려면 기본 분기를 유지하세요.
Composio / Pipedream에서 오셨나요?
| Composio / Pipedream | @oomol-lab/connector |
|---|---|
userId / external_user_id | externalUserId |
connectedAccounts.initiate / createConnectToken(OAuth) | project.connect.oauth |
connectedAccounts.initiate + AuthScheme.APIKey | project.connect.apiKey |
waitForConnection() | project.waitForConnection() |
tools.execute(slug, { userId, arguments }) | project.execute(externalUserId, actionId, input) |
composio.getEntity(userId) | project.forUser(externalUserId) |
SaaS Proxy로 공급자 API 호출하기
ProjectConnector.proxy가 포함된 @oomol-lab/connector 릴리스를 사용하세요. 설치된 버전에 이 메서드가 없으면 HTTP 예제를 사용할 수 있습니다. SDK의 externalUserId와 connectionName은 userId와 alias로 변환됩니다. connectedAccountId가 connectionName보다 우선합니다. 제네릭은 예상 타입만 표현하며 런타임 데이터 검증은 하지 않습니다.
import { ProjectConnector } from "@oomol-lab/connector";

const project = new ProjectConnector({
  apiKey: process.env.PROJECT_API_KEY!,
});

const result = await project.proxy<{ emailAddress: string }>(
  "customer-1",
  "gmail",
  { endpoint: "/users/me/profile", method: "GET" },
  {
    providerConfigId: process.env.PROVIDER_CONFIG_ID!,
    connectedAccountId: process.env.CONNECTED_ACCOUNT_ID!,
    retries: 0,
  },
);

if (result.status < 200 || result.status >= 300) {
  throw new Error(`Provider returned HTTP ${result.status}`);
}
console.log(result.data.emailAddress);
두 계층을 모두 확인하세요. Connector가 성공해도 data.status에 공급자의 2xx 이외 상태가 들어갈 수 있습니다. SDK에서는 result.status와 공급자 응답 본문을 확인합니다. Connector 실패는 SDK에서 ConnectorError로 발생합니다. 잘못된 Project API key는 HTTP 401과 일반 텍스트 Unauthorized를 반환할 수 있으므로 모든 오류를 JSON으로 가정하지 마세요.
OpenConnector: 자체 호스팅 런타임 호출
오픈소스 Connector 서버를 직접 운영하시나요? localhost, Docker 또는 자체 인프라에서? **OpenConnector**는 이를 위한 개인 클라이언트입니다. 직접 운영하는 서버를 대상으로 Connector 표면(두 호출 경로, proxy, catalog, apps)을 그대로 미러링하므로 이미 작성한 코드는 거의 변경되지 않습니다. 서버 구축은 별도의 주제입니다. OpenConnector 자체 호스팅 가이드를 참조하세요.
OpenConnector 클라이언트는 직접 운영하는 런타임을 가리킵니다. 해당 런타임의 구성이 계정 구성, 연결 선택, 액세스 정책을 결정합니다.
import { OpenConnector } from "@oomol-lab/connector";

const open = new OpenConnector(); // local/private setup only; defaults to http://localhost:3000

await open.execute("hackernews.get_top_stories", {});             // path 1 — dynamic string
await open.gmail.search_threads({ query: "from:boss" });          // path 2 — namespace sugar, same registry types
await open.proxy("github", { endpoint: "/user", method: "GET" }); // path 3 — passthrough to an un-modeled endpoint
await open.catalog.search("send email", { limit: 5 });            // catalog extras: search, services
await open.apps.list();                                           // read-only view of the runtime's connections
두 호출 경로와 정밀 타입 워크플로는 개인 Connector와 일치하며, 동일한 @oomol-lab/connector-types 사이드 이펙트 임포트가 적용됩니다. OpenConnector는 proxy.endpoint에 대해 /로 시작하는 상대 경로를 허용하며, 절대 URL은 invalid_input을 반환합니다. 프록시 실행자가 없는 제공자는 proxy_not_supported을 반환합니다.
서버를 가리키도록 설정
baseUrl는 서버 origin을 허용하며, 클라이언트가 API 경로 접두사를 추가합니다. 토큰이 없는 런타임은 localhost 또는 그 외 사설 네트워크에만 적합합니다. 공개 URL을 통해 노출하기 전에 Web Console의 Access에서 런타임 토큰(oct_…)을 생성하고 모든 /v1 및 /mcp 클라이언트에서 이를 요구하세요.
const open = new OpenConnector({
  baseUrl: "https://connect.internal.example.com",       // the server origin
  runtimeToken: process.env.OOMOL_CONNECT_RUNTIME_TOKEN!, // oct_…; required for a public runtime
  connectionName: "work",                                // optional client-level default connection
});
모든 필드는 선택 사항입니다. timeoutMs, maxRetries, fetch은 호스팅 클라이언트와 정확히 동일하게 동작합니다.
런타임 전용 표면
OpenConnector은 다음과 같은 런타임 전용 메서드를 제공합니다:
await open.health();                                    // { ok, runtime } — connectivity / auth probe
await open.catalog.services();                          // every service id that has actions
await open.catalog.search("top stories", { limit: 3 }); // rank actions by free-text relevance
await open.apps.listByService("github");                // one service's connections
await open.apps.authenticated(["github", "notion"]);    // which have a REAL credential stored
연결 선택에는 두 계층이 있습니다: 호출별 connectionName가 클라이언트 수준 기본값을 재정의하고, 둘 다 생략하면 런타임의 "default" 연결을 선택합니다.
관리에는 Web Console을 사용하세요. 연결 생성, OAuth 클라이언트 구성, 런타임 토큰 발급은 콘솔에서 수행하며,
OpenConnectorSDK는 구성된 런타임을 호출합니다. 설정은 자체 호스팅 가이드를 참조하세요. 서비스 id가 멤버 이름(execute/executeRaw/health/proxy/catalog/apps)과 충돌하면execute("<service>.<action>", …)를 통해 호출하세요.
전체 실행 가능 투어 — examples/open.ts.
레퍼런스
Connector(개인 api_… 키)
new Connector(config: ClientConfig)

oomol.execute(actionId, input, options?)     // → action output
oomol.executeRaw(actionId, input, options?)  // → { data, executionId, actionId, message }
oomol.<service>.<action>(input, options?)    // namespace sugar for execute
oomol.using(scope)                           // → immutable scoped sub-client
oomol.proxy(service, { endpoint, method, query?, headers?, body? }, options?) // → { status, headers, data }
oomol.catalog.action(actionId, options?)     // → ActionMetadata
oomol.catalog.actions(service, options?)     // → ActionMetadata[]
oomol.catalog.providers(query?, options?)    // → ProviderMetadata[]   query: { service?: string[]; q?: string }
oomol.apps.list(options?) // → ConnectedApp[]ProjectConnector(프로젝트 oo_proj_… 키)
new ProjectConnector(config: ProjectConnectorConfig)

project.connect.oauth(externalUserId, input, options?)            // → ConnectionRequest (pending)
project.connect.apiKey(externalUserId, input, options?)           // → ConnectedAccount (synchronous)
project.connect.customCredential(externalUserId, input, options?) // → ConnectedAccount (synchronous)
project.getConnectionRequest(connectionRequestId, options?)       // → ConnectionRequest
project.waitForConnection(requestOrId, options?)                  // → ConnectionRequest   options: { pollIntervalMs?, maxWaitMs?, signal?, timeoutMs? }
project.getUserProfile(connectedAccountId, options?)              // → ConnectedAccountProfile
project.execute(externalUserId, actionId, input, options?)        // → action output
project.executeRaw(externalUserId, actionId, input, options?)     // → { data, executionId, actionId, message }
project.forUser(externalUserId)                                   // → ProjectUser (same methods, id bound)
connect.* 입력은 { service | providerConfigId } & { connectionName?, … }입니다(service / providerConfigId 중 정확히 하나). execute 옵션은 { providerConfigId?, service?, connectedAccountId?, connectionName? }을 추가합니다.
OpenConnector(자체 호스팅 런타임, 선택적 oct_… 토큰)
new OpenConnector(config?: OpenConnectorConfig)   // every field optional; baseUrl defaults to http://localhost:3000

open.execute(actionId, input, options?)       // → action output
open.executeRaw(actionId, input, options?)    // → { data, executionId, actionId, message }
open.<service>.<action>(input, options?)      // namespace sugar for execute
open.health(options?)                         // → { ok, runtime }
open.proxy(service, { endpoint, method, query?, headers?, body? }, options?) // → { status, headers, data }   (endpoint must be a relative path)
open.catalog.action(actionId, options?)       // → OpenActionMetadata
open.catalog.actions(service, options?)       // → OpenActionMetadata[]
open.catalog.services(options?)               // → string[]   (service ids that have actions)
open.catalog.providers(query?, options?)      // → ProviderMetadata[]
open.catalog.search(q, query?, options?)      // → OpenActionSearchResult[]   query: { service?, limit? }
open.apps.list(options?)                      // → ConnectedApp[]
open.apps.listByService(service, options?)    // → ConnectedApp[]
open.apps.authenticated(services, options?) // → string[] (services with a real credential)options은 { connectionName?, signal?, timeoutMs?, retries? }입니다(team 없음, using() 없음). config은 { baseUrl?, runtimeToken?, connectionName?, timeoutMs?, maxRetries?, fetch? }를 추가합니다.
내보내기
import {
  Connector,
  ProjectConnector,
  OpenConnector,
  ConnectorError,
  isRetryable,
} from "@oomol-lab/connector";
import type {
  ClientConfig, CallOptions, ScopeOptions, RawResult,
  ProxyRequest, ProxyResponse, ProxyMethod,
  CatalogApi, ActionMetadata, ProviderMetadata, ProviderQuery,
  AppsApi, ConnectedApp,
  ConnectorErrorCode,
  ProjectConnectorConfig, ProjectCallOptions, ProjectExecuteOptions, ProjectProxyOptions,
  ConnectionRequest, ConnectedAccount, ProviderSelector,
  ConnectedAccountProfile, ProviderUserProfile, ProviderUserKind,
  OAuthConnectInput, ApiKeyConnectInput, CustomCredentialConnectInput,
  OpenConnectorConfig, OpenConnectorApi, OpenCallOptions, OpenExecuteOptions,
  OpenCatalogApi, OpenAppsApi, OpenHealth,
  OpenActionMetadata, OpenActionFollowUp, OpenActionAsyncLifecycle,
  OpenActionSearchResult, OpenSearchQuery,
} from "@oomol-lab/connector";
실행 가능하고 타입 검사된 예제는 저장소의 examples/ 디렉터리에 있습니다.
라이선스
MIT, connector-sdk 저장소를 참조하세요.